Tête de Colombe

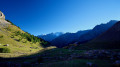
The Tête de Colombe (3,022 m) is a magnificent vantage point accessible to walkers, situated on the ridge running from the eponymous Roche Colombe to the Grand Galibier. Ibex are abundant here; there are no signposted paths leading to this ridge, with the exception of a few cairn-marked tracks.

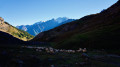
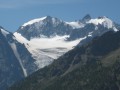
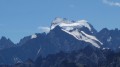
The spectacular panorama over the highest peaks of the Écrins, Grandes Rousses, Cerces and Queyras stretches as far as Mont Blanc and Viso.

Details

15732994
Creation:
Last update:
Last review:
  • Walking
    Activity: Walking
  • ↔
    Distance: 9.36 mi
  • ◔
    Duration according to the author: 8 hrs 
  • ▲
    Difficulty: Very difficult

  • ⚐
    Back to start: Yes
  • ↗
    Ascent: + 4,757 ft
  • ↘
    Descent: - 4,757 ft

  • ▲
    Highest point: 9,915 ft
  • ▼
    Lowest point: 5,594 ft

Photos

Description of the walk

Warning:
Information on how to reach the starting point, as well as details regarding ?♀️ difficulty levels, ? alternative routes and safety precautions, is summarised in the ‘Practical Information ’ and ‘During the Hike’ sections. Any challenging hike requires preparation, and this very difficult hike is no exception.

Signposting:
Most of the walk is off-trail, and there are no signposts. The yellow markings and the red and whiteGR®® markings are of no use for this walk; following them risks taking the wrong paths.

(Start/Finish) Downstream from the bridge on the D1091, head east along the wide, vehicle-accessible track that follows the Torrent du Rif upstream. Leave the track on your right at the first junction and continue along a narrower path which runs alongside the Torrent du Rif, then winds a few times before rejoining the wide track. This track bends northwards to cross tributaries of the Rif beneath pine trees.

(1) As soon as you reach the Alpe meadows, leave the track and take a path on the left which remains at the same level and joins the torrent’s thalweg further north. Turn left (west) to fords the torrent, then climb up through the meadows, which become steeper and turn into scree dotted with pine trees. Continue the climb, always following the easiest route (avoid dense vegetation!) until you reach the Chemin du Roy, which runs horizontally beneath La Lauzière. Turn right (north-east) towards an alpine chalet.

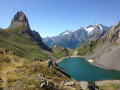
(2) Head north to go round this chalet and head for the Ruisseau du Plan Chevalier. Follow it north-north-west along the right bank until you come within sight of the ruins of a dwelling. Then cross off to the north-east on the right to join the main path which climbs up the left bank of the valley, at the foot of the large boulders from a rockfall beneath the Arêtes de la Bruyère. The path veers northwards and then enters a series of hairpin bends beneath the Col du Grand Lac (see this photo). At the top of the switchbacks, there is a rocky section fitted with cables. Follow these to the pass.

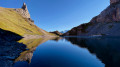
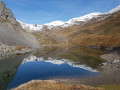
(3) From the pass, take the path northwards which runs along the left bank of the Grand Lac.

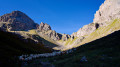
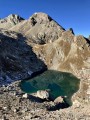
(4) When you reach the northern end of the lake, head north-west to cross its tributary and rejoin a path that quickly reaches a flat area in a small rocky gorge (see this photo – view taken on the descent).

Then move to the right bank of the gorge and head northwards on a diagonal ascent at the foot of rocky ridges and steep gullies. When the ridges turn sharply westwards, turn left, still at their base, and climb up through a wide, grassy cirque interspersed with rocky outcrops (my route takes a wide circular loop to the north, but it is possible to climb due west), until you reach a flat area.

(5) From the plateau, the Col de la Tête de Colombe is clearly visible between two large rocky knolls (see this photo). Climb up at the foot of the couloir leading to the pass, then ascend the couloir, quickly moving to the right-hand side, which is easier.

(6) At the Col de la Tête de Colombe, take an optional detour south-east towards the secondary summit. The route runs along the foot of the ridge and then over magnificent boulders that form a ‘giants’ causeway’ up to the secondary summit (see this photo).

(7) At the secondary summit, head back in the opposite direction towards the pass.

(6) Cross the pass and head up the final couloir (on the right-hand side) to the flat area below the summit. Join the ridges above the Guisanne valley to reach, via the summit plateau, the cairn marking the Tête de Colombe.

(8) After taking in the views and admiring the peaks, begin the descent and return to the pass.

(6) Ignore the secondary summit and descend to the flat area at the foot of the couloir.

(5) From there, instead of heading straight down into the valley, make a wide circular loop to the north, keeping level, to cross a shoulder to the east, below the Col de la Ponsonnière, via a small rocky passage towards the IGN elevation point at 2,508 m.

(9) After the ridge, join a clearly visible path to descend the rocky valley floor, heading south-southeast, to a large grassy plateau. Go round the rocky outcrops on this plateau to the east, following the stream as it meanders peacefully. Follow the stream as it accelerates its descent, turning south, and reach the Grand Lac.

(4). Reach the Col du Grand Lac.

(3) Descend along the left bank of the Torrent du Plan Chevalier. When you come within sight of the Alpe du Lauzet (the mountain chalet you passed on the ascent is therefore on the opposite bank; see this view), continue along the path to the south-east until you reach the footbridge at the Alpe du Lauzet.

(10) Cross the footbridge and, instead of turning immediately right onto the track, continue south-east towards the group of houses at Alpe. Go round these houses to take the correct path heading south-west towards the chapel. Follow this path down until you rejoin the route you took on the ascent.

(1) Follow the path back in the opposite direction to return to the Pont de l’Alpe car park (S/E).

Waypoints

  1. S/E : mi 0 - alt. 5,594 ft - Car park - Pont de l'Alpe
  2. 1 : mi 0.39 - alt. 6,030 ft - Path towards the Torrent du Rif
  3. 2 : mi 1.05 - alt. 6,381 ft - Chalet du Plan Chevalier
  4. 3 : mi 2.13 - alt. 7,549 ft - Col du Grand Lac - Le Grand Lac
  5. 4 : mi 2.48 - alt. 7,500 ft - Tributary of the Grand Lac
  6. 5 : mi 3.53 - alt. 8,484 ft - Flat stretch below the Col de la Tête de Colombe
  7. 6 : mi 4.12 - alt. 9,459 ft - Col de la Tête de Colombe - Tête de Colombe
  8. 7 : mi 4.22 - alt. 9,511 ft - Southern secondary summit of the Tête de Colombe
  9. 8 : mi 4.74 - alt. 9,915 ft - Summit - Tête de Colombe
  10. 9 : mi 6.09 - alt. 8,205 ft - Shoulder below the Col - Col de la Ponsonnière
  11. 10 : mi 8.42 - alt. 6,365 ft - Alpe du Lauzet – Footbridge over the Rif torrent
  12. S/E : mi 9.36 - alt. 5,594 ft - Car park - Pont de l'Alpe

Notes

?️ Park at the Pont de l’Alpe car park on the D1091, N 45.018454° / E 6.465781°. By clicking on this Waze link, you can enter these coordinates directly into your favourite sat-nav app. The road crosses a bridge beneath the car park; a track suitable for vehicles leads uphill to the left (east).

? There is plenty of water all the way to the lakes and below the Ponsonnière ridge. Beyond that, it is scarcer.

? Dogs are allowed in this part of Les Cerces, but it is best to keep your dog on a lead so as not to disturb the wildlife. Herds graze from spring to autumn around the Alpe du Lauzet; watch out for guard dogs.

?♀️ The difficulty of this hike lies on the borderline between ‘difficult’ and ‘very difficult’, due to off-trail sections and very steep slopes.

? Best undertaken in good weather so you can find your way easily and enjoy the views!

? The walk is short and isn’t really suitable for bivouacking unless you want to watch the sunrise or sunset from the summit: the summit is relatively flat and offers a comfortable place to sleep.

? Standard hiking kit is sufficient. At the start of the season and as soon as the snow returns, crampons and ice axes are essential for the ascent to the Col de la Tête de Colombe and the summit (between (5) and (8)).

⏰ There are no specific time constraints, apart from the fact that the Pont de l’Alpe car park gets very busy during the season and at weekends. It is therefore wise to set off early, especially as the morning light is at its most beautiful.

? Finding your way is easy in good weather, but as the route is off-trail, a GPS – or, of course, the Visorando app – is recommended.

  • The terms ‘right bank’ and ‘left bank’ are always used in the orographic sense, i.e. relative to the direction of the water’s flow.
  • A tributary is a stream or watercourse feeding into a lake (the opposite is an outlet).
  • Upstream is the direction towards the top (the mountain), whilst downstream is the direction towards the bottom (the valley).
  • The ‘adret’ is the sun-facing slope; the ‘ubac’ is its opposite.

? There is only one emergency number in France: 112. Other numbers (15, 17, or direct numbers, etc.) have no priority on mobile networks, do not route via other operators’ networks when there is no signal, and in the event of an overload of calls, ongoing calls are cut off to prioritise 112. So forget about them as soon as possible; they are dangerous and no longer serve any purpose (contrary to what some outdated guidance suggests). If you are unable to speak or hear, use 114 to communicate via text message. 112 works on any mobile phone (and landlines, of course), including on a locked phone and even if the SIM card is blocked (however, since 2004, France has been in breach of European recommendations and blocks calls to 112 when there is no SIM card in the phone. This blocking measure required special investment, as the GSM standard naturally permits calls without a SIM card. Taxpayers will appreciate this particularly clever use of public funds).

⚠️ Please note: if your call is cut off, it is up to you to ring the emergency services again: they have no way of contacting you or locating you. Remember to note down your GPS coordinates before calling, as the French government has still not deigned to equip mountain rescue centres with AML (Advanced Mobile Location) technology (despite this having been made mandatory by the EU since 2018).

? In the mountains, switch your phone to 2G: this technology has 4 to 8 times the coverage of newer technologies and uses significantly less power. Remember to switch off your Wi-Fi, as it drains the battery quickly and serves no purpose outside homes and offices. ? Bear in mind that your phone’s GPS location tracking works even in aeroplane mode (GPS has nothing to do with mobile phone calls).

?Checklist

  • ☑︎Essential items in addition to standard hiking kit
  • ☑︎ice axe (only if there’s still snow on the peaks)
  • ☑︎1.5-litre water bottle
  • optional
  • ☐ walking poles
  • ☐ crampons (if an ice axe is required)
  • ☒not required
  • ☒rope and mountaineering equipment

⚠️ As a general rule, treat IGN topographical maps with a pinch of salt (in my experience, the institute never corrects reported errors, even after serious accidents caused by these errors – see my profile for further details and an example). The base maps for IGN topographical maps date back more than 25 years and have not been updated since (!). The free OpenStreetMap, updated by volunteers, is usually much more up to date; it is best to consult its OpenTopoMap version, which is easier to read.

Worth a visit

From the Barre des Écrins to the Roche de Jabel? The panoramic views from the summit are magnificent, offering breathtaking views of all the highest peaks in the Oisans and Écrins regions, as well as the highest peaks of the Cerces, Grandes Rousses, Queyras, Grées and Cotiennes ranges. See this 360° photo, which allows you to immerse yourself in and interact with the landscape and identifyall the peaks visible from this vantage point. See this public album for higher-resolution photos.

? Several route variations are possible. The most interesting is to pass through Roche Colombe on the way there or back, following this walk between (5) and the summit of Roche Colombe.

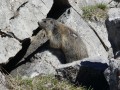
Two etagnes? Alpine wildlife is present; in particular, numerous ibexes inhabit the south-facing slopes of the Tête de Colombe. Chamois are also abundant, but harder to spot.

? Explanation of some terms:

  • ‘aup’ or ‘aulp’ refers to an ‘alpe’, i.e. a place where herds come to graze in summer.
  • A cairn is a pile of stones used as a landmark along a route. You can add cairns if you are sure of the route, and it is useful to replace any stones that have fallen from a cairn.
  • A ‘casse’ is a scree slope.
  • a ‘combe’ is a relatively wide valley or the hollow of a fold in the terrain.

Always be cautious and plan ahead when you're outdoors. Visorando and the author of this route cannot be held responsible for any accidents occurring on this route.

The GR® and PR® markings are the intellectual property of the Fédération Française de Randonnée Pédestre.

Other walks in the area

For more walks, use our search engine .

The GPS track and description are the property of this route's author. Please do not copy them without permission.