

 Country:

 City:
City:


You can reach St. Blasien from Seebrugg railway station by bus route 7139; timetables are available at https://www.rvf.de/fahrplan-netz/fahrplanauskunft/efa. There are designated car parks in St. Blasien.
From Todtmoos, you can take bus 7312 back to St. Blasien and from there take bus 7139 on to Seebrugg. Please do make sure to check departure times and journey durations in advance.
(S) At the spa gardens, we follow the Tusculumweg; the cathedral is on the left. We follow the path slightly uphill, past the two boarding school buildings, and after house number 4 we turn right. We pass under the bypass and follow the path to the right, slightly uphill, to the junction.
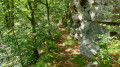
(1) Here, we take the path on the far left and walk for about 100 metres along the Alfred-Weissenberger-Weg; at a fork, we keep to the right and head uphill. We now follow a lovely, narrow path uphill, initially heading east. After a long, sweeping bend to the right, we reach a T-junction; here, following the signs for the Schluchtensteig, we turn left and then immediately left again – continuing uphill the whole time.
(2) At the next junction, we turn sharply to the right and follow the unpaved forest track further uphill. At the next fork, we keep to the left, continuing uphill. We come to a bench.
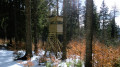
(3) Shortly afterwards, we ignore the turn-off and continue uphill until we reach a feeding station for wildlife.
(4) The path becomes narrower and steeper again; we continue straight on, uphill.
(5) We follow the path to the right, continuing uphill towards Lehenkopf. Soon we reach the Lehenkopf Tower.
(6) To the left of the tower, in front of the tables, a narrow, root-covered path leads us back into the forest; it now heads downhill, curves to the left and, at the next fork, continues straight on downhill to a junction.
(7) The markings are hard to see; we carry on straight ahead, then at the next fork turn right and continue downhill to a shelter.
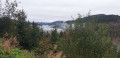
(8) Shortly afterwards, we keep to the right and follow the gravel forest track uphill again until we reach the tarmac road. At the next junction, we keep to the right, cross the road and follow our signpost, which leads us to the left and then to the right along a lovely path, first through the woods and finally across the meadows alongside the fence. We then reach the Horbacher Heide viewpoint.
(9) It’s worth taking a short detour to the viewpoint; the path leads down a few steps to the right. We reach an unpaved forest track with a barrier, follow it to the right and then turn left onto the tarmac road ‘Auf der Breite’, which we follow until we reach the wide track ‘Am Klosterweiher’. We cross the wide road at the bend and walk towards the entrance to the Klosterweiherhof country inn.
(10) The Schluchtensteig trail passes to the right of the inn, then follows a lovely footpath along the Klosterweiher pond, past three benches. Our narrow path then turns left; it climbs relatively steeply in short hairpin bends alongside the power line until we finally reach a wider forest track again, which we follow to the right as far as the information board for the Friedrich August Grube.
(11) Here, turn left and continue uphill to a T-junction with a blue signpost for winter walking trails.
(12) We turn left, ignore the next few turnings and reach a clearing with a magnificent view and the Kreuzfelsenhütte.
(13) We continue along the Kreuzfelsenweg, reach a junction and turn onto the path on the right, which leads us further uphill through the forest. Continuing to follow our signpost, we go straight on at the next junction and, shortly afterwards, turn left onto the Köpfenhaldeweg until we reach the next signpost.
(14) Here, we carry on straight ahead, now along the edge of the forest, on the unpaved forest or field track. At the first junction, turn right, then left, then right again, and then straight ahead once more. The path is well signposted here. We pass several cattle gates; the path leads us partly across the cow pastures and we come across an information board on ‘Typical Black Forest’.
(15) Here, we turn right and head uphill, back into the forest, then descend briefly via a few hairpin bends until we reach the tarmac road known as Klosterwaldweg. Diagonally to our left, we can see the Ibach Peace Cross, our next destination. We walk a few metres to the left along the road and pass another information board.
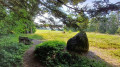
(16) Here we turn right; the path climbs briefly and, once at the top, turns left across the pasture to the Ibach Peace Cross.
(17) A short detour to the rest bench, and the path takes us along the willow fence; at the T-junction, we turn left and then immediately right again. We are now on the Panoramaweg, which certainly lives up to its name.
(18) Just past the shelter, we turn left, follow the Panoramaweg through the woods and back across the pastures to the Lampenschweine summit cross.
(19) A short detour is also worth it here; the Schluchtensteig continues along the Panoramaweg. At the junctions, we keep to the left until we reach a tarmac path (Wachtbühl). We follow this round a sharp right-hand bend and can already see our path to the left below us; we turn left onto it straight away, and it takes us past a small cross.
(20) Shortly afterwards, we reach a road junction. We cross the road and follow the Marksteinweg gently but steadily uphill to a bench.
(21) We continue straight on, still uphill. At the next junctions, we keep to the left and head down the Schwarzerstockweg to the left until we reach the road.
(22) At the Ibacher Kreuz, we cross the busy road, turn slightly to the right onto a narrow path and follow the signposts for the Schluchtensteig (right, half-left and right again) until we reach the entrance to the Hohwehraschlucht.
(23) We turn left into the gorge and follow the path downwards along the Wehra until we reach the first houses of Todtmoos.
(24) At the T-junction, turn briefly to the right, then cross the road and walk along the main road into the village. Follow the signs to the bus car park on the left and cross the Wehra once more.
(E) Here we can board the bus or, alternatively, stay overnight in Todtmoos.
Please end your route description as follows: (E) for a point-to-point walk (S/E) for a circular walk
 Visorando Member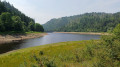
 Difficult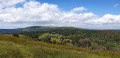
 Easy
Easy