

 Country:

 City:
City:


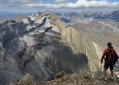
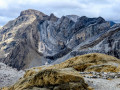
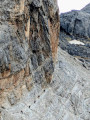
The summer starting point is the large car park at Col de Tentes, in the commune of Gavarnie, at the end of the D923 road.
Please note: this is within the “Heart of the Pyrenees National Park” zone. Camping – whether in a tent, a vehicle (including a motorhome) or any other form of shelter – is prohibited, even in the parking areas. Park rangers frequently issue fines.
The first part of the walk to the Brèche de Roland follows almost exactly the route described by MALRIF in“Le Taillon and the Brèche de Roland from the Col de Tentes”.
(S/E) Continue on foot along the road closed to motor traffic towards the Port de Boucharo, which you’ll reach in 25 minutes. After walking 1.6 km along this old road, at the junction at the Port de Boucharo, look out for a sign on the left pointing towards the Refuge de la Brèche de Roland.
(1) Follow this path, which climbs gently but steadily at the foot of the Gabiétous, then the Taillon. Continue until you reach the first real challenge of the day: a wide glacial barrier beneath the Taillon Glacier.
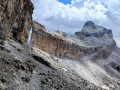
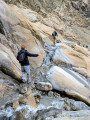
(2) You will then need to cross a rocky ridge with rounded peaks and its waterfall. Take great care on the rock, which can be slippery when wet.
(3) Climb up an area of moraine scree via the winding path. A steep ascent through the upper moraines leads to the narrow Col des Sarradets.
(4) The view across the entire upper part of the Cirque de Gavarnie finally opens up. The path descends and leads to the Brèche de Roland refuge in five minutes. Particularly early in the season, take care if snowfields remain. From the refuge, the view of the Brèche de Roland, due south, is spectacular.
(5) Things get trickier after the refuge and the slope becomes much steeper. Follow the route up to the Brèche de Roland. The path follows the glacier’s moraine (which had melted when I was there, but this isn’t always the case, so you need to be careful), heading due south at first, before veering west and making a wide turn to head back east towards the Brèche. You’ll then reach a flat area from where you can see the Brèche.
(6) You then tackle a steep slope. Take care, particularly at the start of the season, as in places the scree may cover the ice. You reach the Brèche de Roland.
(7) The view is magnificent in both the north and south. What for many is a destination in its own right is, for the mountaineer eager for high peaks, merely a stepping stone to more distant ascents. Yet this pass retains an impressive majesty that never fails to make an impression! After taking a few photos, cross into Spain by continuing to the left, heading east. On the Spanish side, the Ordesa and Monte Perdido National Park looms straight ahead in a rocky landscape stretching as far as the eye can see. You need to follow the cliff face directly to the left to take the path leading to the Pas des Isards. Be careful not to descend too far or stray too far from the cliff. Please note: In this environment, it is not uncommon for GPS devices to lose signal or give an incorrect location.
(8) The Pas des Isards is a tricky and vertiginous passage, equipped with a 30-metre-long chained handrail. It may seem daunting to those less accustomed to such terrain but is by no means technically difficult. In the rain, the handholds can still be slippery, so great care is required. Afterwards, the path becomes less visible; choose the gully that continues to run as close as possible to the cliff face (any section you do not descend at this point will save you from having to climb back up it further on). In summer, this ‘gully’ is the track left by the snowfields melting closest to the rock face, leaving a comfortable passage. Cairns help with navigation all the way to the Col des Isards.
(9) The couloir passes in front of the gaping entrance to the Grotte Glacée des Isards (No. 1), in front of which a low stone wall forms a bivouac shelter. Reach the Col des Isards.
(10) In fact, the route overlooks the pass itself (where you can see numerous other bivouac shelters, made of stones arranged in a circle). Keeping close to the cliff face, you’ll find numerous cairns marking the route through this karst labyrinth.
(11) Continue and turn north-east, climbing up a short, level stretch (where, on the left in the cliff face, asecond Grotte Glacée des Isards, no. 2, opens up). The route is still well marked with cairns.
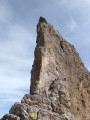
(12) At the fork, unlike the ascent to the Casque du Marboré due north, keep heading north-east, visually aiming for the ridge. Follow a long stretch of path, more than 100 metres below the ridge, passing to the south of the Tour du Marboré, beneath its cliffs. The path (less well marked with cairns), where sharp limestone pavements follow one another, runs along a ledge that is wide at the start but narrows as it passes beneath the Tour du Marboré. Once past the south side of the Tour, the path moves closer to the cliff, which is much lower here. Take the marked route on the left.
(13) Pass the junction for the descent from the Tour (which you will take on the return journey) and continue straight on. There are a few exposed and somewhat challenging sections, but they are not dangerous. When you are roughly directly below the Cirque ridge at an elevation of 2,933 m, head north (crossing perpendicularly – until late in the summer season – a persistent snowfield that is flat and safe). Climb an easy chimney through a gap in the cliff to reach a gently sloping plateau leading up towards the Cirque ridge. Reach the ridge via a long, unnamed pass, just before the Col de la Waterfall.
(14) Take in the awe-inspiring view, on the French side, of the Cirque de Gavarnie, more than 1,300 metres below. It’s dizzying. Watch out for gusts of wind! Continue eastwards to reach the Col de la Waterfall at 2,955 m.
(15) This is where you’ll find the best, unobstructed view of the waterfall in all its different sections! Descend from the ridge to follow a gently sloping couloir (often with snowfields). Pass beneath the Épaule du Marboré; the route is well marked with cairns. Reach the fork at 2,975 m to climb up to the Épaule du Marboré.
(16) Follow the path, which is not shown on the IGN map but is clearly marked on the OpenStreet Rando map. Here you’ll cross the 3,000-metre mark! You’ll then easily reach a wide plateau, from which you can head westwards to reach the Épaule du Marboré at 3,073 m.
(17) Then follow the ridge east-north-east. Reach the easiest of the Pics de la Cascade, the Pic Occidental, standing proudly at 3,095 m.
(18) Continue along the ridge until you are forced to stop due to a wide, deep gap. Then head west along a rocky ridge; there is no need to go all the way round it, as a small chimney allows you to cut straight north to reach the base of the final slopes of Pic Brulle (or Pic Central de la Waterfall). Reach Pic Brulle at 3,111 m via fairly steep and rocky slopes.
(19) Continue along the ridge. Almost at the foot of the final peak of the waterfall, the Pic Oriental, leave the ridge, as it is blocked by an impassable barrier without climbing equipment. Head due west to reach another passage leading back up onto the ridge. Then head back westwards so as not to miss the section leading tothe third peak of the waterfall, the Oriental at 3,161 m.
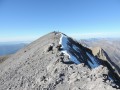
(20) Resume following the ridge towards the Pic du Marboré. The path generally follows the ridge. The Marboré stands out with its rusty-orange sandstone colour, contrasting sharply with the grey of the previous peaks. It’s magnificent! After a strenuous but unchallenging climb, we reach our main objective with great pleasure: the Pic du Marboré at 3,248 m (according to the IGN; 3,251 m according to OSR). It took me 7 hours and 30 minutes.
(21) Here, a vast summit plateau contrasts sharply with the jagged ridges and sharp summit peaks of the previous peaks. All the summits of the Central Pyrenees are visible in a 360° panorama from this unrivalled vantage point, provided you’re lucky enough to have a clear view. And if you’re doubly fortunate enough to have a windless day (which is rare), you can extend your break here!
For the return journey, this route favours a circular route rather than a return trip. But it isn’t necessarily any quicker. Set off down the gentle south-easterly slope, leaving behind the tempting ridges of the Astazous to the north-east and the Cylindre du Marboré to the south-east. Via several shallow gullies, sometimes cluttered with snowfields, head south of the Pic du Marboré to the 2,920-metre ridge.
(22) In this area of sharp limestone pavement, you’ll find quite a few cavities, chasms or snow traps, including one that’s particularly remarkable. Then, head west along a couloir generally running east–west (this is the Brèche de Roland–Mont Perdu route), which is well marked with cairns.
(16) At the junction from the outward journey leading up to the Épaule du Marboré, turn left and continue westwards (after a short stretch heading south). Reach the Col de la Waterfall, which you passed on the outward journey.
(15) Continue along the ridge – an easy but rather long walk – towards the Tour du Marboré. Reach the summit of the Tour at 3,007 m, another iconic peak in the cirque.
(23) For the descent, take care to follow the relatively straightforward, cairn-marked path down towards the south, then south-east across several narrow ledges, which are not exposed. Reach the junction you passed on the way up.
(13) Turn right towards La Brèche. How could you return from this trek across the summits of the Cirque de Gavarnie without completing the task? There is just one summit in the Cirque over 3,000 metres left to climb to finish the story! The story will be written as a seven-part series by conquering Le Casque! Reach the junction leading to Le Casque du Marboré.
(12) Even more easily than any of the other 3,000-metre peaks, turn right as you climb up the sharp limestone pavement.
(24) Pass right next to a deep, wide new chasm. Reach the magnificent, broad summit of the Casque du Marboré at 3,006 metres.
(25) Admire the exceptional landscape one last time from the summit of this viewpoint – the westernmost in the Cirque de Gavarnie – particularly the entire Grande Waterfall of Gavarnie. Follow the same route back in the opposite direction to return to the Sentier des Isards, the Col des Isards, the Brèche de Roland, and then the Col de Tentes car park, the final stop on this magnificent journey (S/E).
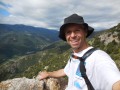
 ). First and foremost, it’s important to point out that this hike is only suitable for experienced walkers and seasoned mountaineers, mainly due to some fairly technical exposed sections (as well as the length of the hike and the elevation gain). We only tackled 4 of the 7 ‘3,000-metre peaks’ mentioned: the Marboré shoulder, the western peak of the waterfall, Pic Brulle (or central peak) and the Marboré peak. I’d already climbed the Casque du Marboré, and as the Tour du Marboré is relatively close to the Casque, I didn’t expect the view to be very different. Finally, on the final ridge, we ‘skipped’ the Eastern Peak of the Waterfall, which is very close to the Pic du Marboré and, for the same reason, was unlikely to offer a very different view. Despite this, my watch recorded 25.25 km and 1,808 m of elevation gain! After an easy start up to the Col de Boucharo (the warm-up), the climb begins gently, then the gradient increases shortly before the Taillon Glacier waterfall. We crossed the rocks over which the waterfall flows, which were, of course, potentially slippery. Then comes a steep climb to the Col des Sarradets, from where there’s an incredible view over the peaks of the Cirque de Gavarnie, and in particular the highest of them all: the Pic du Marboré (3,251 m according to the Spanish / 3,148 m according to the French), our main objective for the day. Shortly afterwards, we reach the Sarradets refuge, then begin a relatively short but intense climb towards the Brèche de Rolland. A level stretch before the final ascent to the Brèche gives us a chance to catch our breath. We then quickly cross a small glacier, and a final burst of effort takes us to the famous Brèche de Rolland, where we’re treated to a double panorama (on the French side towards the refuge and on the Spanish side as we cross the breach. We need to cross this breach and turn immediately left to continue. Wherever possible, always stay as close as you can to the rock face, as the scree below is a nightmare to climb back up if you make a mistake! The ‘Pas des Isards’ is a slightly vertiginous passage, but the chain and the hard, stable rock surface at this point allow you to get through without any trouble if you stay focused! A little further on, we follow the ‘Casque’ and then the ‘Tour’. Shortly afterwards, a chimney on the left – where you need to be reasonably comfortable with technical climbing – leads up onto a plateau. The climb at the top of the chimney isn’t all that straightforward; even though no equipment is required, some hikers have turned back before us. The real difficulty of the hike lies at point (16) on this guide; the route chosen to reach the Marboré shoulder is by no means easy. A section of climbing (using your hands) is required; it’s narrow and vertiginous. It’s certainly stable if you don’t panic, but any mistake is fatal (I did regret a little having set off that way with my son, but once the climb had begun, it was quickly impossible to turn back). The rest of the route is less nerve-wracking; from the shoulder, you reach the ridge with the Pics de la Waterfall and the Pic du Marboré. Less nerve-wracking, but there are still a few technical sections, and some hellish scree slopes to navigate
  ! Stunning panoramic views from all the summits, and especially from the Pic du Marboré! Descent towards the Cylindre de Marboré, down the scree slope before joining the main path to the Pic du Marboré. Return via the Brèche de Rolland and then back to the starting point (the Col des Tentes). In total, 7 hours 57 minutes’ walking plus 1 hour 45 minutes’ breaks (photos, taking in the views, meals) at a relatively brisk pace. In short, a magnificent hike (long and technical), with breathtaking landscapes and unobstructed views at all times. Admittedly, you have to appreciate the rocky terrain (stones, pebbles, rock – but virtually no vegetation
  Visorando Member

 Difficult
 Moderate