

 Country:

 City:
City:


Start from the centre of Drymen.
Official WHW signposting: signposts with a thistle symbol + signposts with a yellow arrow for changes of direction + directional signposts.
(S) Take Stirling Road – the road you arrived on the previous day – and follow it east-north-east along the good pavement on the left. When the road bends to the right, carry on straight ahead. At the end of the tarmac, take a path on the left between two hedges. At the end of the path, continue along the A811, still on the left-hand pavement.
(1) After about 500m, turn left and go through a gate. Follow a good path, first through meadows and then along the edge of the woodland on your left.
(2) At the crossroads, take thesecond forest track on the left (thefirst one is not shown on the map). Walk north-west, climbing gently. You’ll come out onto a small road; follow it to the left for about thirty metres.
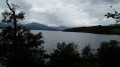
(3) Then turn right, pass a small car park and follow a forest track heading west-north-west. At a junction, ignore the path branching off to the right. Soon, you’ll see Loch Lomond ahead.
(4) At the junction, carry straight on.
(5) At the fork in the road, take the track on the right (north-west). Stay on the main track and cross two rivers in succession via footbridges.
(6) At the crossroads, carry on straight ahead, slightly diagonally to the right, towards Balmaha via the upper road. The woodland gradually thins out.
(7) Pass through a gate and leave the forest. Cross a meadow, climbing slightly, heading north then west-north-west. Cross a river via a footbridge. At a junction, carry on straight ahead and head downhill. Ford a river, then cross the Burn of Mar via a bridge.
(8) You will then begin a steep climb (stone and wooden steps). Further on, the slope levels off: go round the hills to the right. Reach a flat area and walk along the foot of the hilltops.
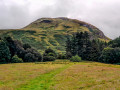
(9) Before the path descends again, leave the WHW briefly and turn sharply left onto a path that climbs towards the summit of Conic Hill. You’ll soon reach a small pass.
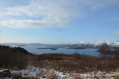
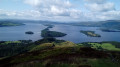
(10) Climb to the left and immediately reach the summit of Conic Hill (extensive views, though slightly obscured to the south-west by a secondary summit). Retrace your steps back to the small pass.
(10) Continue straight ahead (south-west) to reach the secondary summit, from where you’ll enjoy a bird’s-eye view of Loch Lomond. Retrace your steps.
(10) Descend via the path on the left to rejoin the WHW.
(9) Turn left and begin a steep descent along a stony path. At a slight levelling-off, turn left (south) and continue down (stone steps followed by wooden steps).
(11) Pass through a gate, enter the woodland and continue downwards, but more gently. At a T-junction, turn right and continue on roughly level ground. You’ll come to a large car park.
(12) Turn left, cross the car park and pass the National Park building on your left.
(13) You’ll come out onto a road; follow it to the right, keeping to the left-hand pavement, which is soon flanked by a low wall. When the road bends right towards Rowardenann, carry straight on down the dead-end lane.
(14) After about a hundred metres, climb a flight of steps on the right and take an uphill path. Ignore two turn-offs to the left, veer right and reach a viewpoint. Head back down on the left.
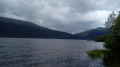
(15) At a three-way junction, turn left and walk along Loch Lomond on your left-hand side. Walk along a beach, then wade across a stream. Continue along the loch for about 1 km until you reach a car park.
(16) Cross the car park, go over a bridge, then turn left to reach the lakeshore. Walk straight along a pebble beach, wading across a stream where necessary.
(17) At the end of the beach, join a road and follow it to the left. Further on, take a path running parallel to the road on its right-hand side. At the end of this, continue along the road for about a hundred metres, then take a path running parallel to it on its left-hand side.
(18) At a junction, cross the small tarmac road leading to the private estate of Crireoch and continue along the path opposite, which soon veers to the left. Go up and down through the woodland. Join the road and follow it to the left for a few dozen metres until you reach a junction (stone benches).
(19) Continue along a path running parallel to the road on your right-hand side. Cross the Cashel Burn and, as you come off the bridge, turn left.
(20) Cross the road again and follow a path between the lake on your left and the road on your right. Walk past Anchorage Cottage, then cross a stone bridge.
(21) Shortly after the bridge, leave the road and turn left onto a path through the woods. After climbing some stone steps, the path alternates between ascents and descents. You’ll reach the lakeside and arrive at the Sallochy campsite car park.
(22) Walk straight across the car park and, at the far end, cross a bridge. Continue along the lakeshore, passing a private jetty and then an information board about the Scottish Centre for Ecology.
(23) At the next three-way junction in the path, take the path on the right and climb a steep slope through the woodland (wooden steps). Descend again, still through the woodland. After passing a house, return to the lakeshore as you approach Mill of Ross (an old mill).
(24) Cross a river and continue towards Rowardenann. Cross another river via a footbridge.
(25) At a T-junction, turn left. Walk past a small cove on the lake, then head uphill through the woodland before descending again. You’ll come out onto the road; follow it to the left as far as the Rowardennan Hotel (E).



 National Park
 Easy
Easy  Association / Club / Walk leader
 Tourism professional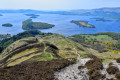
 Moderate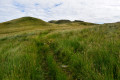
 Visorando Member