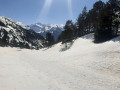
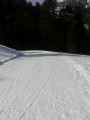
⚠️ This description relates to a hike undertaken as a pair in winter (January 2021) with average snow cover that was not fresh. From (1) onwards, no path or signposting is visible! Most of the route will follow the description accompanied by a GPS track, or even in addition to the tracks left by previous skiers or snowshoers.
Only attempt this route if you are fully proficient in snowshoeing or ski touring, and in the use of crampons and an ice axe. This is not a route for beginners.
This hike can be undertaken in summer, following roughly the same route and staying – as far as possible – on the slopes and paths, which are clearly visible throughout.
“Parking at the start”
On the right-hand side of the road, there is space to park around ten vehicles in summer, though slightly fewer in winter.
Estimated time
I completed this route on snowshoes in 5 hours 30 minutes, including breaks and a picnic, setting off from the car park at 10.25 am. This is a ‘normal’ time. Allow between 5 and 6 hours. In summer, allow 4 to 5 hours 30 minutes.
Difficulty
I’ve rated it as Difficult due to the length and elevation gain of the route, the steep sections between (1) and (3), and the fact that the route is unmarked. It’s a fairly challenging route where you need to maintain a good sense of direction and keep your cool.
In summer, the rating is Moderate.
The IBP Index (an automated system for assessing the difficulty of a route) is 86 HKG, which corresponds to a ‘Difficult’ route for a walker of ‘Average’ fitness.
Water sources
- In winter, when there is snow, the streams in the Ravin de Chérue woodland can be used as water sources without too much risk; however, there are none beyond this point. You should, however, allow for 1 litre of cold water per person and 1 litre of hot water in a thermos flask per person.
- In summer, there are no sources of drinking water. The safety of other springs, lakes, rivers or runoff water cannot be guaranteed, due to grazing livestock. Allow 2.5 litres per person.
Shelters
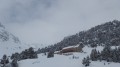
The Chérue Hut can serve as a permanent shelter along the route.
Please note that in summer, the hut is very busy at night; you must arrive very early.
Equipment
- In summer, bring standard mid-mountain hiking kit: hiking boots, suitable clothing, rainwear, water, food, a survival blanket, a knife, a compass, a map and a whistle.
- In winter when there is snow, you must also bring snowshoes or touring skis, a pair of poles, gaiters, sun cream, lip balm, a GPS or the Visorando app on your smartphone, gloves, suitable warm clothing, a thermos flask with a hot drink, a hat, and sunglasses suitable for the glare off the snow. Some people will also take an avalanche transceiver (DVA), a shovel and a probe. On this route, crampons and an ice axe are essential.
Trail usage
- In winter when there is snow, you’ll see plenty of tracks left by ski tourers or snowshoers along virtually the entire route up to (1). However, depending on the day chosen and the weather, it’s possible to be on your own all day.
- In summer, the route is very busy along the entire trail (except between (1) and (2), which is off-trail).
Whatever the season, don’t forget to let your friends and family know your exact route and inform them of any changes by text or phone.
‘Snowshoes + poles, or crampons + poles, or crampons + ice axe’
If you’re setting off early in the morning in the middle of winter, it will probably be more comfortable to use crampons as far up the slope as possible if the snow is very crusty. Indeed, walking in crampons is almost identical to walking in shoes, with the added advantage of being able to safely navigate small flat sections or gentle icy slopes, and above all narrow, overhanging sections of hard or icy snow.
When putting on crampons on flat ground or gentle slopes, you keep your poles. As soon as the gradient exceeds 15 to 20 per cent, snowshoes and poles are stowed away and securely fastened to your rucksack, and you use the ice axe. Using an ice axe requires a good level of skill, particularly in the event of a fall or when descending.
Météo-France Mountain Bulletin and Avalanche Risk Assessment Bulletin (BRA or BERA)
Check the weather forecasts, particularly the Météo-France snow and avalanche bulletin for the Ossau-Aspe massif in the Pyrénées-Atlantiques. Calling the High-Mountain Gendarmerie unit or the High-Mountain CRS may also put your mind at rest.
Avalanche-prone areas
This route is not known for avalanche risk.
The slopes face east and, depending on the BERA risk assessment checked before setting off and the depth of snow present, you should keep a watch out for any cracks that might precede an avalanche or snow slide. If there are several of you, ensure you maintain safe distances.
Be on the lookout for any cornices on the ridges.
Alternative route
At the Cabane de Chérue (1), you can head south-west to reach the start of the Crête Lavigne-Chérue, at the foot of the Pic de Chérue (2,198 m).
The ascent is slightly less steep than on this route, but the distance is greater (almost double that of this route).
If, whilst on your route or whilst consulting the map you are using, you notice any errors in signposting or place names, or …, you can become a contributor and report them:
- errors in signposting, safety issues, conflicts of use, environmental concerns, …: click here
- mapping errors, place names, etc.: click here



 Country:

 City:
City:





 Visorando Member

 Easy
Easy 
 Moderate