The Tournette circular loop starting from Montremont

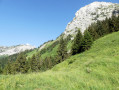
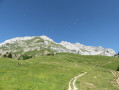
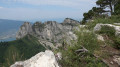
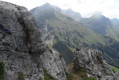
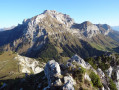
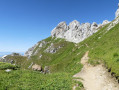
Starting from Montremont, I suggest you follow a lovely route on the Montagne de la Tournette, taking in numerous viewpoints: the ascent is via the Col de Frêtes de Rosairy, where you are unlikely to encounter many people, then the return via the classic route from the Chalet de l’Aulp – which can be quite busy – before reaching the Col des Nantets. The challenges lie in the elevation gain and distance, but above all in certain exposed sections requiring caution: ⚠️ Please take full note of the explanations and warnings in the ‘Practical Information’ section.

Details

100048925
Creation:
Last update:
Last review:
  • Walking
    Activity: Walking
  • ↔
    Distance: 10.38 mi
  • ◔
    Average duration: 9h 25 
  • ▲
    Difficulty: Very difficult

  • ⚐
    Back to start: Yes
  • ↗
    Ascent: + 5,364 ft
  • ↘
    Descent: - 5,341 ft

  • ▲
    Highest point: 7,710 ft
  • ▼
    Lowest point: 2,713 ft

Photos

Description of the walk

Start the route at the end of Route de Montremont (a few parking spaces available).

(S/E) At the start, follow a wide path to the left and then continue straight on at the junction with a track. When you reach the Refuge de Lisba, carry on straight along the path until you come to a track.

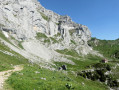
(1) You’ll reach the wide bed of a stream, which you then follow upstream for a few metres (marked by cairns). From the right bank, take an ascending path and follow it for some distance, negotiating a few hairpin bends. Care is required on a few narrow sections. Please note that some sections are potentially exposed to rockfalls.

(2) After the Abri des Varos, continue along the route, soon reaching a rugged and exposed section (which may be vertiginous for some people): there are some safety cables to aid access, but caution is required, particularly on a short section where these appear to be missing. Further up, the route then proceeds relatively smoothly, reaching the Col des Frêtes via numerous hairpin bends.

(3) Continue to the right along the ridge, then join another path on the left. Follow this for a short while through terrain that gradually becomes quite rocky. Return to the ridge.

(4) Not far from a junction, head straight on, due south, towards the imposing rock formation (known as the Fauteuil), and walk along the base of the cliff on its left-hand side.

(5) After a few metres, head right towards a chimney which you must climb using the cables provided, then reach the summit via a ladder. Please note: this section is very well equipped, but requires a degree of caution. Carefully retrace your steps back to the junction on the ridge line mentioned earlier.

(4) Follow a path to the left towards the Chalet de l’Aulp, then tackle a few rocky sections involving downclimbing, equipped with cables (take care in this area).

(6) Continue along the route for a short while, passing a few steep sections. Further down, you’ll reach a plateau near the Refuge de la Tournette (which has been closed since 2009).

(7) Carry on straight ahead, passing the Chalet du Casset; after a section along a ledge, the path descends steeply.

(8) Once you reach the Chalet de l’Aulp, head straight on (GRP®) towards the Col des Nantets: the path descends to a stream, then climbs again towards the Chalet des Crottes.

(9) Continue to the right (GR®) along the ascending path to the Col des Nantets.

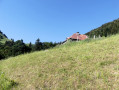
(10) Leave the GR®. Carry on straight ahead towards Montremont. Walk for a while, passing the Chalet du Mont. After a short, steeper descent via a few hairpin bends, you’ll reach a path near a building: turn left and you’ll soon arrive at the end of the Route de Montremont (S/E).

Waypoints

  1. S/E : mi 0 - alt. 2,720 ft - Montremont – La Joux – Car park
  2. 1 : mi 0.39 - alt. 3,002 ft - Bobsleigh track - Malnant (cours d'eau) - Affluent du Fier
  3. 2 : mi 2.12 - alt. 4,459 ft - Abri des Varos
  4. 3 : mi 3.41 - alt. 5,745 ft - Col des Frêtes de Rosairy - Col des Frêtes de Rasairy (1753 m)
  5. 4 : mi 5.02 - alt. 7,569 ft - North Ridge of La Tournette
  6. 5 : mi 5.16 - alt. 7,710 ft - La Tournette
  7. 6 : mi 5.68 - alt. 7,041 ft - Col du Varo (2151m)
  8. 7 : mi 6.83 - alt. 5,830 ft - Le Casset
  9. 8 : mi 7.99 - alt. 4,675 ft - Chalet de l'Aulp
  10. 9 : mi 8.54 - alt. 4,367 ft - Chalet des Crottes
  11. 10 : mi 8.91 - alt. 4,678 ft - Col des Nantes (1426m)
  12. S/E : mi 10.38 - alt. 2,713 ft - Montremont – La Joux – Car park

Notes

The route starts from Montremont at the end of the road (visible on Google Maps).

Good walking boots and walking poles are recommended.

Please take your rubbish away with you – nature will thank you for it.

Below is a difficulty rating for each section (the route is not uniform):
- Green: fairly straightforward walking with no significant elevation gain or difficulty.
- Blue: slopes and/or elevation changes are more pronounced on a well-marked route.
- Orange: routes presenting some technical difficulties and/or poor trail conditions (markings or visibility of the path).
- Red: a difficult route due to significant elevation changes that may require some climbing, in an environment presenting certain hazards.
- Black: a route on a fairly difficult trail and/or involving imminent dangers.
- White: routes through very challenging technical terrain requiring specific equipment.

The hike should be undertaken once the last of the snow has melted (from June–July) and until the first snowfall. Whilst access to the Col des Frètes is virtually impossible during winter as it is cut off by several avalanche couloirs, just before the summer season there may still be patches of late snow in ravines, which can make progress difficult or even impossible.

I was a little unsure about which direction to take:initially, I’d opted for the anti-clockwise route (starting at the Col des Nantets and the Chalet de l’Aulp), as it’s easier going, but the potential difficulties I might encounter below the Col des Frètes de Rosairy on the return leg tipped the balance in favour of the opposite direction. To summarise, the route can be completed in either direction, but I would particularly recommend, especially at the start of the season (i.e. from June to early July), that you follow the direction indicated.

The route between the summit of La Tournette (5) and that of the Chalet de l’Aulp (8) is quite busy during the summer months.

At the Col du Varo (6), you may opt to follow a path to the right that leads more directly to the Chalet du Casset, although the route is more challenging in this direction: on a path that is not always clearly visible, it involves a tricky section through rocky terrain equipped with fixed handrails.

From (S/E) to (1): Green difficulty
The start of the route is straightforward, following a path.
Unmarked until the junction, then follow the Yellow-Red GR® de Pays Massif de Tournette-Aravis markings + signposts.

From (1) to (2): Blue difficulty
Head up the wide, stony riverbed, using the cairns for guidance; the route then follows a path with a few narrow sections requiring a degree of caution. This entire section is potentially exposed to rockfalls and should only be tackled when there is no late snow, which could make progress difficult or even impossible.
Yellow-red GR® de Pays markings + signposts.

From (2) to (3): Orange difficulty
Shortly after the Abri des Varos, you reach a section that may be vertiginous for some people: this requires a degree of caution when crossing a torrential ravine exposed to the steep slopes of the hillside, not to mention the ever-present risk of rockfalls. A few safety cables provide support, but they appeared to be missing over a short section when I passed through. The rest of the route is then much easier right up to the pass.
Yellow-red GR® de Pays markings + signposts (note that the one at the pass was no longer there when I passed through).

From (3) to (4): Blue difficulty
The path continues, gradually winding through a fairly rocky landscape (beware of a chasm along the way). Late snow may still be present in this section before the summer season.
Informal red markings.

From (4) to (5): Orange difficulty
Access to the summit is via a chimney very well equipped with cables, followed by a ladder, but it requires a degree of caution. This spot can get quite busy during the summer months and there may be a bit of a queue (if this is the case, you might want to consider not attempting the ascent, especially as the view from the ridge area is already stunning).
Signposting: Yellow arrows + signposts.

From (4) to (6): Orange difficulty
You’ll encounter further challenges on a few rocky sections, some of which are slippery in places; use the cables for support: please take care
Markings: Yellow arrows + signposts.

From (6) to (7): Blue difficulty
After the Col du Varo, continue along the path descending to the left towards the plateau below. Along the way, there are a few steep sections.
Marked with yellow arrows and signposts.

From (7) to (8): Blue difficulty
After crossing a ledge, the route follows a steep downhill slope; note that the entire route in this section has been revised relatively recently and there are numerous signs encouraging you to follow it.
Markings: Yellow Arrows + signposts.

From (8) to (10): Blue difficulty
Continue along the path on the right without any particular difficulties; the route descends and then climbs.
Markings: Yellow arrows + signposts.

From (10) to (S/E): Blue difficulty
After crossing the pass, continue along the path to the right without any particular difficulties. After the Chalet du Mont, the route follows a slope that becomes steeper before returning to the starting point (S/E).
Signposting: Yellow arrows + signposts.

Always be cautious and plan ahead when you're outdoors. Visorando and the author of this route cannot be held responsible for any accidents occurring on this route.

The GR® and PR® markings are the intellectual property of the Fédération Française de Randonnée Pédestre.

Other walks in the area

For more walks, use our search engine .

The GPS track and description are the property of this route's author. Please do not copy them without permission.