

 Country:
 City:
City:


The walk starts at the HEAG mobilio bus stop on Ludwigstraße in Jugenheim; there are car parking spaces along Schwarztannenstraße and its extension, Ludwigstraße.
(S/E) Depending on where you park, cross the junction at “Heidelbergerstraße/Alte Bergstraße” and walk along “Ludwigstraße” into Jugenheim.
You’ll come to a roundabout; go straight ahead along ‘Hauptstraße’ towards a large house with green shutters.
In front of the house with the green shutters, turn left (still on “Hauptstraße”), and after a few metres, turn right through a gate and up a narrow path. To help you find your way, look out for the Blue Castle on the Burgensteig or the red ‘A’ on the Allemannenweg.
You’ll reach the road leading to Heiligenberg Castle; follow it to the right, then just before the memorial, turn left again and leave the road to head up the narrow path.
You’ll arrive at the Bergkirche at the top; turn right at the junction and you’ll rejoin the track leading to Heiligenberg Castle. Here, head left for a few metres before turning right straight away (“Oberer Wingertsweg”). The Burgensteig marker (Blue Castle) serves as a guide at this point.
(1) You’ll pass two benches. There’s a sign on the bench on the right reading ‘Jugenheim Bench Secrets’. The text is quite informative and might just spark your curiosity to go on a tour of Jugenheim to discover the other (bench) secrets.
Continue along the path until you reach a junction, where you keep to the left. You’ll now walk along the base of the Kreuzgarten’s boundary wall until you reach a T-junction. To the left, you can now take a detour to the monastery ruins, or head straight down to the right towards the Schlossteich.
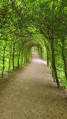
Before the castle pond, turn right and then left, passing the ‘Rehhäuschen’ on your right, and enter the historic arbour.
At the next two junctions, keep left and stay on the arbour until you rejoin the track leading to the castle.
Here, turn right towards the castle gate.
Walk round the castle anti-clockwise, passing the rose garden (on your right), and just before the car park, turn right onto a gravel path.
This path leads you uphill to a fork, where you keep to the left.
Look out for the“SJ1” signpost to help you find your way. The wide path climbs steadily for quite some time. Once at the top, you’ll come to a barrier, and beyond that, a junction.
Here, turn left onto the tarmac path. You can now use the‘SJ2’ signpost for guidance.
You’ll walk a short distance across open countryside, then back into the woods, staying on the tarmac path which continues uphill.
At the top, you’ll come to a junction; here, turn right onto a gravel path. The path continues steadily uphill; at every fork, stay on the gravel forest track. The “SJ2” signpost still serves as your guide.
(2) To your right, below the path, you’ll see the Jakobsbrünnchen. A sign on the right-hand side of the path tells you about its origins and the restoration work carried out.
The path continues uphill, through a sharp left-hand bend towards a junction. At the junction, take the second path on the right from your current position.
(3) After a while, you’ll see a rather ageing mountain hut on your right. This is a good spot to take a break and enjoy the view of the Felsberg.
You’ll now emerge from the woods and walk gently downhill across the fields, past the Krämerhof and towards the Landhotel Kuralpe-Kreuzhof.
In front of the hotel, cross the road and walk towards the bus stop, then turn right just before the stop.
(4) At the signpost marked “Kuralpe”, turn right towards Felsenmeer/Riesensäule. The path leads uphill along a narrow forest track.
At a fork, keep to the right and stay on the path, which leads you straight up to a tarmac road. Here, turn left.
(5) You’ll pass the beer garden of Ada’s Buka restaurant on your left and, level with the car park, you’ll come to the Nibelungensteig (Red N), which you follow to the left past an information board for the Felsberg Nature Reserve.
(6) At the ‘Altarstein’ signpost, carry on straight ahead downhill. You’ll first pass a mountain hut (Grieshammer Ruhe), then an information board about the Altarstein and the working methods of Roman stonemasons, before continuing your descent.
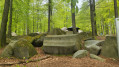
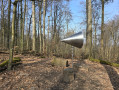
(7) You’ll reach the Giant Pillar. There’s another information board here too. Opposite the Giant Pillar is the Felsenmeer Kiosk (usually open from April to the end of October; closed in bad weather).
Just behind the kiosk, your path continues downhill. You’ll reach a wider path, which you cross diagonally; on the other side, follow the ‘N’ sign down the narrow path.
Please note: The narrow path leads to the bridge. The bridge is currently (as of early May 2023) no longer there. You’ll have to find your own way through the rocks to the other side. If that’s not for you, you can continue hiking to the left here and take the bypass to reach the Felsenmeer Information Centre relatively easily.
--
At the next junction with a signpost, turn left towards the bridge and find your own way through the rocks to the other side.
(8) Once there, you’ll see a small shelter; continue to follow the red ‘N’ down to the Felsenmeer Information Centre. Here, at the Koboldklause, you’ll have the chance to grab a bite to eat.
Before the information centre, turn right, walk along the meadow and turn right again at the first opportunity. Follow a tarmac path back up towards the Felsenmeer.
On the left-hand side of the path, you’ll see a triangular sign with a green border marked ‘Naturschutzgebiet’ (nature reserve) and, in front of it, a signpost pointing left marked ‘Felsberghütte’.
Follow the narrow path to the left, which leads you uphill again. Opposite two rock formations, you’ll reach a wider forest path. Turn left here. You can use the ‘3’ signpost to help you find your way.
At the fork in the path immediately after this, keep to the left. Opposite a bench, you’ll reach a wider, slightly gravelly path. Turn left here as well.
(9) On the left-hand side of the path, you’ll pass an old electricity distribution box that has been converted into a nesting site for various bird species.
At the next junction (signposted ‘Talweg’), take a sharp right behind the information board onto a narrow path. This leads you further uphill.
The path merges into a wider, partly gravelly track, before turning into a wide, gravelly forest track at a T-junction.
Here, turn right. A few metres further on, you’ll see our current trail marker, the ‘3’, on a tree.
Your path now takes a sharp bend to the left. Follow it further uphill.
(10) You’ll come to a junction. Here, turn left. You can use the red ‘A’ of the Alemannenweg as a guide. A little further on, you’ll reach a fork in the path. Here, keep to the left. To help you find your way, you’ll now see the trail marker from the start of your walk again: SJ2.
(11) Follow the path to the next junction (signposted ‘Hahlwald’) and turn right towards the ‘Not Gottes’ car park, Auerbach Castle and the ‘Schollrein’ car park.
After a while, you’ll come to a loop; you can walk round it either to the left or to the right – your path continues straight ahead on the other side.
At the next junction, you’ll come across the Nibelungensteig (Red N) and walk straight ahead downhill (landmarks: Red N and SJ2) towards Melibocus.
(12) Stay on this path until you reach the edge of the woodland. The route then continues downhill across the fields, and you’ll pass a beautifully situated rest area on your right. It’s well worth taking a short break here, if only for the view.
Further down, you’ll cross a car park and go over a bridge to cross the road to Balkhausen. On the other side, you’ll head uphill again, walking along the edge of the forest and across fields, with the transmission mast on Melibocus in view.
(13) In a long, sweeping right-hand bend, you’ll pass another rest area; then you’ll cross a junction, pass two benches on your left and walk straight ahead up the narrow, steep forest path (unmarked).
Further up, you’ll come to a gravel path and, for a short stretch, the Nibelungensteig signpost will guide you. At the next junction, turn right off this path onto a narrow track that leads you further steeply uphill.
You’ll reach a T-junction and turn right, following the narrow woodland path straight ahead. Cross the next junction straight ahead without turning off. At the following junction, keep to the right, and at the next one, turn left and head downhill.
(14) At the end of the path, you’ll come to a gravel track. To your left is a small refuge, the Darsberghütte.
Cross the gravel path, enter the Darsberg wildlife reserve (green sign) and continue straight ahead, uphill once more. After a few metres, you’ll reach the summit of the Darsberg (374 m), where you turn left at the fork in the path.
You’ll reach another gravel path and continue walking towards a seating area on the opposite side. Just before you reach it, you’ll see a red sign on a tree to your left marked ‘106 Darsberg’ and, right next to it on the following tree, ‘107 Jossa’.
You’ll walk through a hollow, the former moat of Jossa Castle.
(15) You suddenly find yourself in front of a few remains of the rampart. Here, you have the option of making a detour onto the plateau.
You now head downhill along the narrow path. You cross a gravel track and reach another wide gravel track, where you turn right. Your path joins a wide forest track; here, you continue downhill to the left.
You reach a T-junction; continue to the left. Shortly afterwards, you come to another fork in the path; keep to the right there and walk towards a barrier. For guidance, you can follow the Burgensteig trail markers (Blue Castle) from here.
At the next opportunity, turn right. Follow the path, which leads past a few imposing property driveways and joins the “Hicklerweg”. This turns into the “Pauerweg”, which you’ll soon leave by turning left onto “Am Kuchenpfad”.
At the end of the road, turn right onto “Alsbacher Straße”. You’ll reach “Hauptstraße” and continue straight on into “Sandmühlstraße”. At the Friedensbrunnen, you’ll come to “Bahnhofstraße”; turn right and then immediately left onto “Ludwigstraße”, and you’ll be back at your starting point (S/E).
 Visorando Member

 Easy
Easy 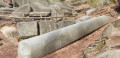
 Difficult