


 Country:

 City:
City:


Park in the car parks along Rue de la Clairie, near the care home.
No signposting
(S/E) Walk up Rue de la Clairie, then, at the roundabout, turn right onto Rue du Hohneck. Continue to Rue du Moyenmont.
Green Rectangle signposting
(1) Walk up this street to the left, then, at the bend, turn right towards a house before staying on the path to the left of the letterbox. When you reach the lane at the top, keep left before turning right onto Rue de Bellevue. At the fork in the road, keep left and take the path that continues from the cul-de-sac. Further on, keep right then left until you reach a crossroads.
No signposting
Turn left to reach the Roche d’Aivau.
(2) Return to the junction via the same route.
Yellow Ring markings
Turn left onto a downhill path. Pass a junction on the left before heading up to the right at the next crossroads, towards La Roche Beuty. The path is more technical and at times very rocky. The slope is steep as you climb to the top of the rock. Pass the access points to the climbing areas on the right and left and keep straight ahead.
Green Rectangle markings
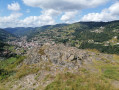
At the junction with the Yellow Ring path coming in from the right, turn left to head for the Roche Beuty viewpoint.
(3) After taking in the view, continue along the path. At the next two junctions, near an aerial, keep to the left onto a flat track. You’ll come to a junction.
(4) Head all the way to the right towards the lodge. Pass close to it, keeping to the left. At the pass at the top of the climb, leave the path that heads right towards Moyenmont; then, when you reach the track, keep to the right and follow it to Pré Jacquot.
(5) Pass the house on your left and the path on your right, continuing to climb the middle track. Cross a woodland, keeping straight ahead, and arrive at a junction as you emerge from it.
(6) Here, the markings on the IGN maps are out of date. Turn right at a right angle to climb up through a meadow. Then head straight into the woodland, ignoring a junction. Pass a path on the left and two others on the right to reach the summit of the mountain. Stay on the path, which bends to the left. Ignore the next path on the left, then another branching off to the right, and yet another path coming from the left. You will then reach a wide track.
(7) Keep to the right and follow the track straight ahead to the Collet de l’Étang. Keep to the right all the way towards the shelter.
(8) Facing the shelter, continue left onto the Chemin de la Piqançoire. Keep going straight ahead until you reach the spot known for its viewpoint, spring and bench. At each junction, keep going straight ahead, ignoring the paths—some in better condition than others—on the left and right. Join the Chemin des Champis.
(9) Keep to the right, then pass a disused track on the left. Ignore another track on the right and proceed to the junction with the Chemin de la Tenine.
(10) Head up to the right before continuing straight ahead at the junction. Then pass a grassy track that descends to the left and go through the gate. In the meadow, keep to the left towards the Cabane des Champis.
(11) Follow the track and ignore two junctions on the left. Cross the Red Drop and climb slightly to reach the Chemin de Mariron.
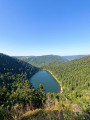
(12) Follow this path to the left, downhill. Stay on this path, which continues to descend straight ahead and is the clearest route. At the ski lift, enjoy the view over Lac de Lispach. Pass the lake and, at the bend, head right-hand side. Pass the ski lift again, return to the woodland and ignore a path leading uphill to the left. Take the path on the right before heading straight on to join the road.
(13) Head off to the right.
Yellow Ring markings
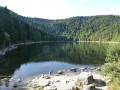
Then take the first path on the left, which runs alongside the lake. This path crosses several footbridges and passes several cultural and tourist information boards. At the junction after a footbridge, keep straight ahead. At the bend in the lake, ignore the path climbing left towards the Collet de la Mine and stay alongside the lake. You’ll reach the junction for the old copper mine.
(14) Head up to the left towards the mine. Cut across the track and take the path which starts opposite, via a wooden footbridge. At the hairpin bend, keep left and do the same at the next junction to reach the mine.
(15) Return along the track via the same route.
Green Rectangle Markings
Follow this track to the right and, further on, pass a grassy path coming from the same direction to reach the small pass of the Mine.
(16) Follow the second track on the left, which starts with a very steep slope. Pass a path on the right, then another, heavily overgrown one, on the left before reaching a third junction.
(17) Continue straight on along a track that is flatter. Pass a path on the left, then another on the right, and repeat this to reach the pass.
(18) Turn left twice to follow a level track. At the first junction, keep straight ahead to reach a second, Y-shaped junction.
(19) Head up to the right and you’ll reach a cleared area. Pass the two paths branching off to the left and the next one to the right to reach the signposted path leading to the Tête de Grouvelin.
Markings: Green Rectangle with a white cross
(20) Turn sharply right and pass a discreet junction. At the hairpin bend, go left before quickly turning right. Once out into the open, head towards the top of the ski lifts and continue to the orientation table.
(21) Turn back, then at the junction at the foot of the small hill, head straight ahead along a row of trees. Enter the forest and, as you go, admire the works of various artists. Pass a path on the left, then another on the right. At the next junction, turn right to leave the forest and reach the bottom of the Les Hêtres ski lift.
Green Rectangle Signpost
(22) Turn left onto the track and, at the junction, keep to the right. Pass a path on your left and continue along the edge of the forest. You’ll reach a Fork in the road.
(23) Stay on the ridge towards the Roche des Bioquets. Pass a path that heads into the forest, then begin the final ascent.
No signposting
Just below the summit, turn right to climb to the top and reach the highest point and the orientation table.
(24) Enjoy the view and head back down towards the signposted path.
Green Rectangle markings
Continue to the right, across open ground, then into the forest, keeping to the right. Pass a junction to reach a large crossroads.
Red Triangle Markings
(25) Turn left, leave the woodland and continue straight ahead onto a downhill track. Ignore the paths and tracks branching off to the right and left and stay on the main track. You’ll then reach the junction for the footbridge; turn left towards it.
(26) Cross the footbridge, then turn right to head down the county road. Cross one road carefully and arrive at another.
Blue Triangle signposting
Head down the path on the right towards La Bresse. At the crossroads in the hamlet, keep straight ahead and follow the path to the last house on the left. After this, turn left and reach the departmental road.
(27) Cross this road very carefully. Take a quick first turn right then left and, at the end of the cul-de-sac, continue along the track to the junction.
(28) Turn sharply right and ignore a path leading down to the left to reach the road. Walk down the road and quickly take the footpath on your right, which runs alongside it. At the next junction, turn right, then right again to reach the Waterfall du Pendant Pré.
(29) Cross the stream via a footbridge, then pass a viewpoint with its wayside shrine. At the junction, turn right and do the same at the next one. After passing close to a house, keep left and ignore the next path on the left to cross a stream via a footbridge. You will then rejoin the road.
(30) Walk up this road and round two bends. After the second bend, take the path on the left, heading downhill, and cut across a track to reach another path.
(31) Continue downhill, then, when you reach the track, head left until you reach the Ruisseau de Chajoux. Then follow the road to the right until you reach the roundabout. Take the street opposite and follow it back to the starting point (S/E).
 Visorando Member
 Difficult
 Moderate
 Easy
Easy