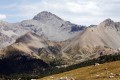
Le Grand Peygu

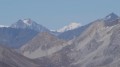
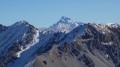
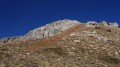
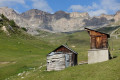
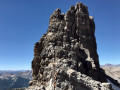
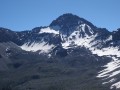
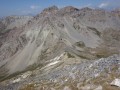
This is a very striking pyramid that irresistibly catches the eye as you climb the Col d’Izoard. Yet this small, cramped summit reveals an extraordinary panorama of the Ecrins, the Vanoise, the Cerces and the Queyras, and even Mont Blanc. Its short but very challenging ascent is well worth the detour.

Details

275213
Creation:
Last update:
Last review:
  • Walking
    Activity: Walking
  • ↔
    Distance: 2.83 mi
  • ◔
    Average duration: 3h 10 
  • ▲
    Difficulty: Difficult

  • ⚐
    Back to start: Yes
  • ↗
    Ascent: + 2,159 ft
  • ↘
    Descent: - 2,159 ft

  • ▲
    Highest point: 9,134 ft
  • ▼
    Lowest point: 6,969 ft

Photos

Description of the walk

From Briançon, take the D902 towards the Col d’Izoard. Pass through Cervières and then the hamlet of Le Laus, and park in the small car park situated on a right-hand bend in the road at an altitude of 2,120 m, just before a long straight stretch. From here, you’ll see a wide lane leading to the Chalets d’Izoard.

(S/E) From the car park, take the track leading to the Chalets d’Izoard. Continue along this track or, better still, take the first small path on the left to cut across the hairpin bends. You’ll reach the mountain pastures in the wide valley of the Chalets d’Izoard fairly quickly, until you come to the chalets themselves, which are now just the ruins of old farmhouses.

(1) The Grand Peygu rises to the north-west. Climb its left ridge: to do this, make your way gently up through the mountain pastures to the west-south-west, either along a small path or off-trail, as you prefer.

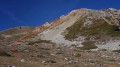
As you approach the base of the peak, follow the trough to the left of a scree slope and then join the ridge line.

Climb up the grassy terraces off the beaten track, following the cairns and passing to the left of the rocky outcrops.

Cross a gap marked by a cairn, then ascend along the southern ridge of the peak, keeping the rocky outcrops on your left.

This will take you to the summit bastion; cross a slightly steep section, using your hands if necessary, then head towards the summit cairn.

(2) Begin the return journey in the opposite direction along the same route to reach the car park (S/E).

Waypoints

  1. S/E : mi 0 - alt. 6,975 ft - Car park on the D902
  2. 1 : mi 0.32 - alt. 7,172 ft - Izoard Chalets
  3. 2 : mi 1.42 - alt. 9,131 ft - The summit
  4. S/E : mi 2.83 - alt. 6,975 ft - Car park on the D902

Notes

I’ve made a video showing the route and the atmosphere of the walk.

(2) Le Grand Peygu: This summit, marked by a cairn, is relatively cramped. It can accommodate no more than three or four walkers.
It’s a summit you have to work for, as the climbs up the terraces are very steep and you’ll need to zigzag your way up and take breaks.
On this ascent, it is important to spot and then carefully follow the trail marked by cairns, which are quite widely spaced.

Reviews and comments

5 / 5
Based on 2 reviews

Reliability of the description
5 / 5
Ease of following the route
5 / 5
Route interest
5 / 5
Britanicus100
Britanicus100

You're welcome. Thank you for your feedback on this little, pointed, off-the-beaten-track peak, which remains one of my favourites.

Machine-translated

Pasnog
Pasnog

Overall rating : 5 / 5

Date of your route : Oct 30, 2024
Reliability of the description : Not used / Not applicable
Ease of following the route : Not used / Not applicable
Route interest : ★★★★★ Very good
Very busy route : No

There was no marked path at the start of the climb up the Grand Peygu, and even with the GPX track we struggled to find a few cairns. At around 2,500 metres, we were able to follow a rough path. It was a challenging climb – very steep and a bit exposed just below the summit – but well worth the effort: a magnificent 360-degree view at the top. Thank you for sharing this route.

Machine-translated

Netra
Netra ★

Good evening,

Thanks to philip05 for his feedback and to the author for his prompt reply.

When it comes to navigation, as well as the equipment mentioned, a good old-fashioned printed copy of the map provided as a PDF can also be useful… It doesn’t need a battery whilst you’re out and about, and it doesn’t weigh much.

Machine-translated

Britanicus100
Britanicus100

Thank you for going on this hike and for climbing to the top of that little pointed peak. I’m really pleased.
When it comes to navigation, do consider investing in a GPS with a built-in memory card (so you never lose your data) for a map such as the GPSmap64.
At worst, you won’t need a map to find your way – just follow the imaginary route you’ve mapped out in advance on your computer.
It’s a good idea to print out the Visorando route on an A4 map background to get an overview.
Then simply load the Visorando GPX file onto the GPS and off you go. Here’s a short video I’ve made on how to use this equipment and a link to a guide I’ve written.
https://www.dailymotion.com/video/x3y6pv...
https://www.altituderando.com/Comment-ut...
All the best.

Machine-translated

philip05
philip05

Overall rating : 5 / 5

Date of your route : Jul 01, 2016
Reliability of the description : ★★★★★ Very good
Ease of following the route : ★★★★★ Very good
Route interest : ★★★★★ Very good

I can confirm just how steep the climb is! I’d read up on the walk the day before, but once I got there, there was no 3G signal, so no Visorando map. As a result, I went a bit too far before turning off and had to cross a scree slope to get back onto the ridge. The last 300 metres are marked by small cairns, but before that… nothing. As this walk is apparently not very popular, the path is barely visible. The descent went better than I’d imagined. At the summit, the view is interesting and at times you feel as though you’re close to the Imola route! (the motorbike climb up the Col d’Izoard).
Happy hiking.
Philip

Machine-translated

Other walks in the area

For more walks, use our search engine .

The GPS track and description are the property of this route's author. Please do not copy them without permission.