

 Country:

 City:


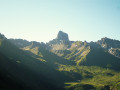
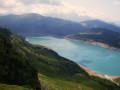
(S) From the Refuge de la Balme, rejoin the GR®5 (south-west). At the Fork in the road (alt. 1,720 m), marked by a sign, ignore the path on the right and take the one on the left. Walk beneath the high-voltage power line (south-east). After the waterfall on the left, at the signpost (alt. 1,910 m), leave the GRP® Tour du Beaufortin on your right and continue straight ahead. On a flat stretch, move away from the high-voltage line to follow the Bon Nant stream at a junction.
(1) Do not cross the footbridge leading to the basic, unmanned Jovet hut, but follow the path running parallel to the torrent until you reach a narrow footbridge further on, which may seem daunting (alt. 1,931 m).
(2) Cross and then go round a rocky spur, enter a gap and climb up it via a few hairpin bends. Pass under the high-voltage power line, rejoin the Bon Nant and follow its stream to reach the Col du Bonhomme and its rudimentary, unmanned shelter.
(3) At the pass, ignore the path to the right (south-south-west) and continue along the GR®5 (south-east), which winds its way up the steep slope of the Rochers du Bonhomme. At its highest point (alt. 2,480 m), cross the Nant Lotharets at a narrow point in its ravine and, some 150 m further on, at the junction sign, ignore the path to the left running alongside the stream towards the Col des Fours and head straight on to the Refuge de la Croix du Bonhomme.
(4) From the refuge, the GR®5 and GR®TMB routes diverge. Ignore the GR®TMB path to the left (east) towards the Col de la Croix du Bonhomme and follow the GR®5, GTA path to the right. Descend (south-west) towards the exposed Crête des Gittes, then climb it and follow it to reach the Col de la Sauze.
(5) At the pass signpost, head down the path (south-west). Leave it at a hairpin bend to the left (alt. 2,240 m) to follow the path opposite and, further down, join it again at the Chalet de Bel Air (alt. 2,140 m). Shortly after the few hairpin bends that follow, rejoin the path.
(6) Join the track again just before it bends to the right. At around 1,930 m, leave it at its left-hand bend, where it turns south-east, and continue along the path opposite (south-west). At the junction by the Chalets du Plan Lai (alt. 1,820 m), continue along the path, passing the Lodge du Chalet du Berger (west), then, via a car park, join the D925 road to the Cormet de Roselend.
(7) Take the road to the right and, after the Refuge du Plan de la Lai, leave it to take a path on the left. Cross the car park. At the fork, ignore the path on the left leading to the mountain farm and take the one on the right to reach the Plan Mya mountain refuge (alt. 1,860 m). Head up a small valley (south-west), ignoring a path on the right leading to the Crête du Biolley, and arrive at a flat area at the Chalet le Mora.
(8) Ignoring the paths on the right, continue along the track (south-west). At its bend to the left (south), a beautiful view of Lac de Roselend opens up. After about 200 m, leave the track as it turns (south-east) to follow a path (south) and climb the switchbacks up a steep slope. At the top, rejoin the track and follow it to the right until you reach the junction about 200 m further on.
(9) Leave the track and turn onto the one on the left (south). Pass in front of the Petite Berge chalet and, at the left-hand bend, leave the track (east) to take the almost level footpath (south). At the fork (alt. 2065 m), head down the path on the right and, at around (alt. 2010 m), cross a torrent. Head back up (south-west) towards a small pass and the ruins of La Grande Berge.
(10) At the signpost opposite, descend the switchbacks (south-south-west) to reach a Fork in the road (elevation 1,996). Keep left and reach the access path to the basic shelter at La Grange.
(11) Leave this on your right and join a track (alt. 1,920 m). Turn left onto it and, immediately afterwards, at the Fork in the road, follow the track descending to the right, then reach a junction at the hamlet of Lavachay.
(12) Ignore the path on the right leading to the chalet and continue along the almost level path opposite. Cross a very muddy area (south) where wearing gaiters will prevent mud from getting into your shoes. Reach a Fork in the road.
(13) Turn left, cross (south) a path winding down the slope, then the track that cuts across it. Climb (south-east) up the slope to join this path (alt. 1,940 m). Follow it to the right (south-west), pass the ruins of the Presset chalet and, just after that, reach a junction.
(14) At the signpost, leave the track that branches off to the right and climb to the left, straight up the slope, following the path (south-southeast) then (east). Rejoin the track and cut across its hairpin bend to rejoin it about a hundred metres further on (elevation 2,114).
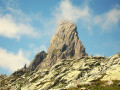
(15) Let the path continue southwards; stay on the footpath heading south-east. After a wide hairpin bend, resume the south-easterly direction, then climb in a zigzag up the slope to reach the Col du Bresson, dominated by the legendary Pierra Menta to the right.
(16) At the signpost, descend to the right, taking the hairpin bends whilst cutting across the traverse paths. Pass a scree slope and follow the bed of a torrent (south). Cross it in front of the La Motta shelter (alt. 2,210 m). At the junction (alt. 2,150 m), ignore the path on the right towards the Col de la Charbonnière, turn left into the Vallon du Torrent l’Ormente and head for the Refuge de la Balme (E).
 Visorando Member
 Moderate
 Difficult
 Tourist office