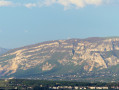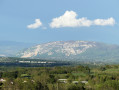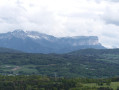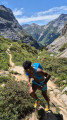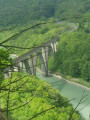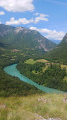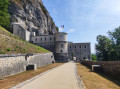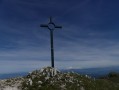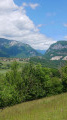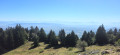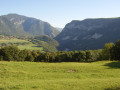
The Vuache in its entirety from Chevrier

Starting from Chevrier, I suggest you walk the entire length of the Vuache, through a largely wooded landscape, dotted with some lovely viewpoints. The return route follows the foot of the mountain on the eastern side, offering beautiful panoramic views. The main challenge is the distance to be covered.

Details

49204342
Creation:
Last update:
Last review:
  • Walking
    Activity: Walking
  • ↔
    Distance: 14.24 mi
  • ◔
    Average duration: 9h 40 
  • ▲
    Difficulty: Difficult

  • ⚐
    Back to start: Yes
  • ↗
    Ascent: + 3,550 ft
  • ↘
    Descent: - 3,550 ft

  • ▲
    Highest point: 3,632 ft
  • ▼
    Lowest point: 1,637 ft

Photos

Description of the walk

The route includes short detours leading to various viewpoints: these are optional and not all are listed in the description, so as not to make it too lengthy. For further details, see § Practical Information.

Start at Place du Chêne, in the heart of the village of Chevrier: parking spaces are available, but they are limited.

(S/E) Facing the mountain, take the Chemin de la Saint Victoire. From here, follow the white-and-redGR® Balcon du Léman signposting as far as the vicinity of Chaumont.

(1) Carry on straight ahead at the fork: the initial slope is gentle, but it becomes steeper further on. Higher up, the path becomes easier and, whilst you’re there, I suggest you take a track on the right leading to a lovely viewpoint on the eastern side (see the route map).

(2) You’ll reach the Sainte-Victoire Oratory: from here, you can take a short round trip to a viewpoint on the western side. Heading almost due south, continue along the path towards the Sommet du Vuache (white-and-redGR® markings).

(3) Carry on straight ahead at the junction (the path on the right leads to Arcine Castle).

(4) About 300 metres further on, carry straight on at the junction with another path.

(5) After a short while, you’ll come to another path (marked ‘Golet du Pey Ouest’): keep to the right.

(6) About 100 metres further on, you’ll reach another junction: if you wish, you can make a round trip to the Clarafond viewpoint. Continue left along the path (heading south-east).

(7) You’ll pass by a hut: from here, the route becomes more rugged, with a series of ascents and descents.

(8) Reach the summit of Vuache, marked by a large cairn. There are no views from this spot. Continue along the path.

(9) Further on, you’ll reach a relatively open spot offering views to both the east and west (the only such spot on the route). After a slightly rugged descent, you’ll reach a more peaceful stretch through the undergrowth, then along the edge of a mountain pasture.

(10) Ignore a fork to the right and cross an alpine pasture before re-entering the forest; along the way, there are a few short sections with fairly steep slopes.

(11) Just before Chaumont, you’ll come to a fork and leave theGR® Balcon du Léman markings. As an option, I suggest taking a variant of the route (see the ‘Practical Information’ section). Follow a gently ascending path on the left. After a descent, you’ll join a track further down.

(12) Continue to the left, towards Tire-Cul (car park), following the white-and-red markings (GR®965). Not far on, at a Fork in the road, turn left.

(13) After a short while, you’ll reach a junction: continue along the small road towards Cortagy.
From here, you leave theGR® route and follow the yellow arrow markings until you return.
Shortly after leaving the hamlet, keep to the right onto a path running parallel to the road.

(14) At a fork, take the path on the left; then, when you reach a small road, follow it to the right.

(15) Walk through the hamlet of Olliet, continuing along the small road.

(16) Walk through the hamlet of Cessens via the Chemin de la Villa, then, further up, continue to the right towards a farm.

(17) Follow the path on the right, heading downhill.

(18) About 200 metres further on, take a path on the left: a pleasant walk through the woodland leads you down to a track which you should follow to the right. Then continue along the small road and, further down, cross the bridge over the motorway.

(19) Turn left at thefirst junction, then left again a few metres further on. Walk alongside the motorway on your left (this is the least pleasant part of the route). Ignore the first two junctions and, at the third, turn right onto the footpath.

(20) Shortly after the Tire-Cul car park, follow the small road to the left as far as La Chavanne (please respect private property), then continue along the path uphill. At a fork, take the path on the right, heading downhill.

(1) You’ll reach the Haut de Chevrier, a spot you’ve already passed on the outward leg: keep right to return to the Place du Chêne (S/E).

Waypoints

  1. S/E : mi 0 - alt. 1,637 ft - Chevrier – Place du Chêne
  2. 1 : mi 0.14 - alt. 1,722 ft - Haut de Chevrier. Junction of the circular loop
  3. 2 : mi 1.13 - alt. 3,058 ft - Sainte-Victoire Oratory
  4. 3 : mi 1.99 - alt. 2,874 ft - La Balme – North
  5. 4 : mi 2.17 - alt. 2,904 ft - La Balme – South
  6. 5 : mi 3.09 - alt. 2,802 ft - The Golet du Pey East
  7. 6 : mi 3.29 - alt. 2,825 ft - Golet du Pey Ouest
  8. 7 : mi 3.6 - alt. 2,920 ft - Forest hut
  9. 8 : mi 5.49 - alt. 3,632 ft - Summit of Vuache
  10. 9 : mi 5.95 - alt. 3,491 ft - Viewpoint
  11. 10 : mi 6.57 - alt. 3,081 ft - Junction towards Champs Rosset
  12. 11 : mi 7.42 - alt. 2,060 ft - The Mount
  13. 12 : mi 7.86 - alt. 1,995 ft - Pré Luison
  14. 13 : mi 9.61 - alt. 2,057 ft - Cortagy
  15. 14 : mi 10.17 - alt. 2,106 ft - The little cottage
  16. 15 : mi 10.46 - alt. 2,218 ft - Olliet
  17. 16 : mi 10.97 - alt. 2,365 ft - Cessens
  18. 17 : mi 11.3 - alt. 2,487 ft - Cessens – Farm
  19. 18 : mi 11.41 - alt. 2,411 ft - La Pierre Plate
  20. 19 : mi 12.12 - alt. 2,083 ft - Raclaz d’en Haut
  21. 20 : mi 13.05 - alt. 2,116 ft - Tire-Cul – Car park
  22. S/E : mi 14.24 - alt. 1,637 ft - Chevrier – Place du Chêne

Notes

The starting point can be viewed on Google Maps: click here.

It is recommended that you wear good walking boots and carry walking poles.

Take your rubbish away with you – nature cannot break it down.

The western slope of the Vuache massif is a protected natural area subject to regulations. Click here to find out more.

As an option, I suggest two alternative routes:
- the first takes you to the pretty village of Chaumont, then on to its castle (an extra 1 km or so). Click here for the route description.
- The second, just past Cessens, follows a slightly more ‘natural’ route through woodland. With this option, the distance covered is almost the same and the additional elevation gain is negligible (around 20 metres). Click here to view the route description. The challenge may lie in finding your way through unmarked sections in a wooded area (though the presence of a few old signposts may help).

The mountain is criss-crossed by numerous trails and paths, and many other routes are available. For example: a shorter version of a circular route to the point (4) or even to (5), then a return via various forest tracks.

The route passes by a number of viewpoints, which are marked on the map:
- Thefirst is situated just before the point (2). Estimated GPS coordinates: 46.107932°N 5.899889°E
- Thesecond is accessible from the point (2).
- Thethird is encountered between the points (2) and (3). Take care as there is a cliff nearby. Estimated GPS position: 46.103654°N 5.900816°E
- Thefourth viewpoint, known as the Clarafond viewpoint, is accessible from the point (6).
- The5th and 6th are situated between points (7) and (8):
-- thefirst on the right at estimated GPS position = 46.076223°N 5.921129°E
-- and thesecond on the left at an estimated GPS position of 46.06843°N 5.932178°E
- Theseventhis located slightly beyond the point (8) at the estimated GPS position = 46.058591°N 5.939101°E
- The8th is encountered along the route at the point (9)

Below is a difficulty rating for each section (the route is not uniform):
- green: fairly straightforward route with no significant elevation changes or difficulties.
- Blue: slopes and/or elevation changes are more pronounced on a well-marked route.
- Orange: route presenting some technical difficulties and/or poor route conditions (signposting or visibility of the path).

From (S/E) to (1): green difficulty
The route follows an easy path along a small, gently ascending road
White-red markings –GR® Balcon du Léman

From (1) to (2): blue difficulty
On the ascent, you follow a path that starts off gently sloping before becoming steeper.
White-red markings –GR® Balcon du Léman

From (2) to (4): blue difficulty
Follow a path with gentle gradients and few difficulties.
White-red markings –GR® Balcon du Léman

From (4) to (7): green difficulty
You’ll follow a path that’s generally quite comfortable, with minimal elevation changes.
White-red markings –GR® Balcon du Léman

From (7) to (8): blue difficulty
This section can be divided into two stages:
- Thefirst involves the ascent and descent of an unnamed peak with a few tricky slopes
- Thesecondinvolves the ascent to the summit of Vuache, which is fairly gradual.
White-red markings –GR® Balcon du Léman

From (8) to (9): blue difficulty
The path follows a fairly gentle route with minimal difficulty, except for the end of this section (caution advised).
White-red markings –GR® Balcon du Léman

From (9) to (10): blue difficulty
The trail presents a few challenges on the downhill sections (please take care). Towards the end of this section, the route follows a wide path alongside mountain pastures, making for a comfortable walk.
White-Red markings –GR® Balcon du Léman

From (10) to (11): blue difficulty
The path winds through an area of mountain pastures. Once you reach the forest, the going is a little less comfortable in places.
White-red markings –GR® Balcon du Léman

From (11) to (12): blue difficulty
You follow a pleasant little path without encountering any major difficulties.
Unmarked section (finding your way is not a problem). Signposts at the start and end of the section

From (12) to (13): blue difficulty
A track suitable for vehicles, followed by a footpath, is fairly easy to follow.
White-red markings –GR® 965

From (13) to (14): green difficulty
A small road, followed by a footpath, are taken along an easy stretch.
Yellow arrow markings.

From (14) to (16): green difficulty
A footpath, followed by a small road, are followed without encountering any difficulties
Marked with yellow arrows.

From (16) to (17): green difficulty
A small road, followed by a path, are followed, again without any difficulties.
Marked with yellow arrows.

From (17) to (18): green difficulty
Follow a track downhill.
Marked with yellow arrows.

From (17) to (19): blue difficulty
The route follows a pleasant footpath, then a small road
Marked with yellow arrows.

From (19) to (20): blue difficulty
You initially follow a rather unpleasant path running alongside the motorway. You then continue along a small road, followed by a track suitable for vehicles, and then a path on a steeper slope for a few metres.
Marked with yellow arrows.

From (20) to (1): blue difficulty
At first, the route is very easy along a small road and a track; then it moves onto a path with steeper slopes; and finally, it continues along a small road heading downhill.
Marked with yellow arrows.

From (1) to (S/E): green difficulty
Follow the Chemin de la Sainte Victoire back to the starting point
Marked with white and red arrows –GR® Balcon du Léman

Worth a visit


** Numerous information boards line the route: these are mainly found between points (2) and point (5)

** Celtic oppidum of Vuache: read the article in the Dauphiné Libéré by clicking here

** Sainte Victoire Oratory: read the article by clicking here

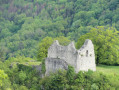
** Arcine Castle: read the Wikipedia article by clicking here.

** Chaumont Castle: read the Wikipedia article by clicking here.

Always be cautious and plan ahead when you're outdoors. Visorando and the author of this route cannot be held responsible for any accidents occurring on this route.

The GR® and PR® markings are the intellectual property of the Fédération Française de Randonnée Pédestre.

Reviews and comments

5 / 5
Based on 2 reviews

Reliability of the description
5 / 5
Ease of following the route
5 / 5
Route interest
5 / 5
kaolak1
kaolak1
• Edited:

Overall rating : 5 / 5

Date of your route : Sep 02, 2025
Reliability of the description : ★★★★★ Very good
Ease of following the route : ★★★★★ Very good
Route interest : ★★★★★ Very good
Very busy route : No

Beautiful views and a hike that takes place mostly in the woods, so it's perfect when it's hot.

It's true that the return trip is very long and the section on tarmac isn't particularly pleasant, but I loved the loop because this kind of trail is fantastic

Machine-translated

monile
monile

Overall rating : 5 / 5

Date of your route : Jun 16, 2024
Reliability of the description : ★★★★★ Very good
Ease of following the route : ★★★★★ Very good
Route interest : ★★★★★ Very good
Very busy route : No

Thank you.
Thank you for this lovely walk – it was a brilliant outing with some superb views.
The start is indeed a bit steep, but nothing you can’t manage.
There are a few tarmac roads but very few vehicles, plenty of undergrowth – which is very welcome in hot weather – and forest tracks that were perfectly passable despite the previous day’s rain.
We met a few walkers coming the other way who asked us if the summit of Vuache was still a long way off… (We were on the descent just past the summit with the large cairn.)
It took us 7 hours 45 minutes, including a 30-minute snack break, to cover 23 km.
No issues with the GPS.
Thanks again to the author for this lovely route.

Machine-translated

Other walks in the area

For more walks, use our search engine .

The GPS track and description are the property of this route's author. Please do not copy them without permission.