

 Country:

 City:
City:


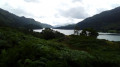
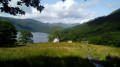
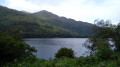
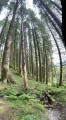
Start from the Rowardenann Hotel.
Official WHW signposting: signposts with a thistle symbol + signposts with a yellow arrow for changes of direction + directional signposts.
(S) Head north along the road, then onto a path running parallel to it on the right-hand side.
(1) When you reach a car park, turn right towards theyouth hostel. Pass a small building on your left and follow a path through a shaded area. Reach the lake and continue north.
(2) At a fork in the road, take the track on the right (the one on the left leads to the Youth Hostel). At the next fork in the road, turn left. Further on, ignore the entrance to a B&B on the right and carry straight on along the track. Cross a river and continue along the track through the forest. You’ll soon reach the lakeside and carry straight on for about 2 km.
(3) At a fork in the road (private access on the left), take the path on the right, go through a metal gate and head uphill. You will reach the junction of two possible routes on the WHW.
N.B. The location of this junction on the OpenSpace base map is inaccurate.
(4) At this point, there are two options that converge at the point (7):
- Follow the lower road downhill, as the signpost indicates.
- Follow the upper road, as shown on the map and described below. Then turn right onto the correct path, which continues to climb through the forest. The gradient is steady and moderate. Pass through an oak forest and then, on a flat stretch, through a coniferous forest.
(5) Note a lovely viewpoint over the lake (bench) a few metres to the left. Continue along the correct path, which descends through a forest of oak and birch trees.
(6) Ignore a path branching off to the left and carry on, climbing slightly. Descend again and, further on, rejoin the lower road coming from the left (here again, the OpenSpace map is not entirely accurate).
(7) Continue downhill. Ford a river, climb back up and then go downhill again. Reach the lakeside and cross a river via a footbridge. Take another footbridge to cross the Cailness Burn.
(8) As you leave the footbridge, turn left and cross an area where ferns grow in abundance. Then climb some stone steps. Cross several footbridges and alternate between short ascents and descents for some time, whilst staying close to the lakeshore. After an information sign for the Great Trossachs Path, cross the Arklet Water via a footbridge (waterfall). Go down the steps on the left to reach the Inversaid Hotel.
(9) Leave the hotel on your right and cross the car park diagonally to the left to rejoin the WHW signposting. Set off along a good path, passing a sewage treatment plant and a sign for the Inversnaid National Reserve.
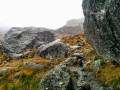
(10) Go round a metalboathouse on the right, turn left and cross a footbridge. After another footbridge, the path winds its way between rocks and tree roots. Walk past the base of the cliffs and reach a junction (a short detour to the left is possible towards Rob Roy’s Cave).
(11) Continue to the right along the path. Stay close to the lake at all times on the winding, stony path, which alternates between short ascents and descents. This section may seem a bit long…
(12) Take a wooden ladder and then a footbridge to cross a waterfall. Continue along the path beside the lake.
(13) The path leaves the lakeshore and continues straight on into the forest. Climb gently between the small hill of Creag a Mhadaig on your left and more imposing hills on your right. Emerge from the forest and continue on roughly level ground. Head back down and pass some old buildings on your left.
(14) Return to the shore of Loch Lomond. Continue along the path and fordo a few rivers.
(15) Turn away from the lakeshore again and begin an ascent. Cross a footbridge. Just after crossing a stile, you’ll reach a junction.
(16) Continue straight on towards Inverarnan. Walk alongside a low stone wall and continue climbing: the slope is steep at first, then becomes more gentle.
(17) Reach a flat stretch and cross a few wet areas (wooden beams). Pass a small loch on your left (Dubh Lochan).
(18) Pass a few ruined buildings and begin the final descent. Pass under a high-voltage power line and continue downhill. Cross the Ben Glas Burn and you’ll soon reach Beignglas Farm (E).

 Visorando Member
 Moderate
  Tourism professional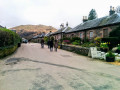
 Easy
Easy 

 Association / Club / Walk leader