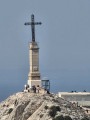


 11/09/2024: Closure of the Imoucha trail for 3 months, from 1 October to 31 December (2024 and 2025). Hiking is not possible during these periods. See practical information.


 Country:

 City:
City:


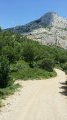
Park in the upper Aurigon car park, leaving the first car park on your right.
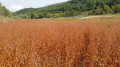
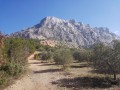
(S/E) Go to the end of the car park and pass the two retractable bollards that prevent vehicles from passing. Cross the concrete bridge and then take the small wooden footbridge on the right to cross the large meadow towards the north-east. Enjoy the view of Montagne Sainte-Victoire. Reach the end of the meadow and cross the bridge.
(1) Take the uphill track on the right marked with green lines and theGR® 653A: this crossroads is also used on the way back.
Climb up the track. At the hairpin bend to the right, go straight ahead on the path that continues eastwards. This is a shortcut that rejoins the track a little further on.
(2) Continue east on the track that takes you near the Hameau du Trou and the Refuge Cézanne. Leave them on your right and head north.
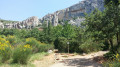
(3) Leave the track and take the path that winds between the low walls of old terraces. As you cross the ridge, take a look at the rock called "Le Baiser" (The Kiss). Follow the path up through the rocks called "Pas du Dinosaure" (Dinosaur's Footsteps). You will come to a crossroads.
(4) (546m) Take the path on the right marked "Difficult" and marked with red lines. You will soon reach the "Pas du Berger". This is a fairly vertical slab of about 5m which is climbed on the left and then to the right (good holds on the right). The trail is then steep, turning right after a ledge, then left onto slabs. Follow the markings carefully to Pas du Moine, where you will reach the Imoucha trail.
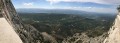
(5) (767 m) Here you will discover the northern slope of the mountain. Head for the wall above you. Instead of following the blue markings, turn left, heading due east, and walk along the wall, first at the bottom and then at the top, until you reach the white-red marked trail, which is theGR® 9, Chemin des Venturiers.
(6) Descend this path, which becomes a rescue track. The descent is steep until you reach a hairpin bend to the right.
(7) (370 m) Take the unmarked path on the left, leaving theGR®9here, which climbs slightly at the beginning, through the undergrowth. The path then descends, passes along the edge of a field and runs alongside a river called La Cause. Follow the river and cross it twice. You are now following a track on the left bank. Leave it by turning north to enter the land left vacant when the lake was drained.
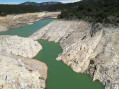
(8) Cross the ruined bridge. Continue to the centre of the empty lake to reach the gorges.
(9) The landscape opens up onto a vast space overlooked by the dam. Two posts have remained there since the reservoir was filled. Pass by the metal post and continue south-west. Head back up towards the bank because if you stay at the bottom until you reach the dam, you will not be able to climb back up due to unstable cliffs.
(10) Follow the edge of the vegetation towards the south and descend as soon as possible into the dry valley. Walk up the valley from the bottom. At the edge of the vegetation, take the unmarked path uphill.
(11) Cross the Imoucha Trail (351m) and continue climbing south-southeast. You are now in the Vallon de la Dispute.
You will come to a fairly level track. Turn right, heading due west. Five minutes later, the track descends.
(12) Turn left and take a track that descends. You will see a few green dots and theGR® 653A markers. At the bottom of a concrete track, you will find yourself in an old shooting range, the eastern part of which is sometimes off-limits (275m). Cross it towards the south, taking the path that is slightly to the left of the previous track. Follow the stream to the initial crossroads.
(1) Go around the meadow on the left along the stream via a path to reach the car park. (S/E).



 A rare temporary hike, with an expiry date fast approaching: the lake will fill up again after the Bimont dam is repaired. That's why you had to make the most of it!
 Visorando Member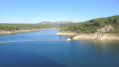
 Moderate
 Easy
Easy 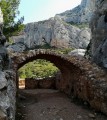
 Extremely difficult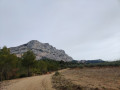
 Association / Club / Walk leader