

 Country:

 City:
City:


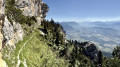
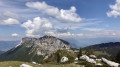
Please read the warning and practical information carefully; this hike requires preparation.
(S/E) From the starting point (see practical information), head south-east along the wide, vehicle-accessible track that passes between the houses. The track steepens rapidly. You’ll reach a flat area on a ridge, from where a path branches off to the left. The entrance to this path is sometimes blocked by a cord.
(1) Take this steep, straight path which climbs north-north-east up the ridge. Watch out for calf cramps (stay hydrated). The path is soon marked by small cairns and blue markers. It crosses various less steep paths, but you must always stay on the ridge and follow the steepest route.
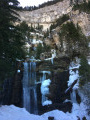
Shortly before a clearing, the path splits into two, with the two branches rejoining further on in the gully, from where you can see the cirque and the Saint-Même waterfalls to the north. Walk up through the clearing for 30 metres to rejoin the significantly less steep path, which now veers south-east into the forest. At the first point where the path opens out onto a large scree slope, take the left-hand path which winds its way up the steep scree; a few cairns and the occasional blue and red markings indicate the route.
At around 1,650 m, the path comes to a small ledge which it climbs (remember to look behind you) to reach a cave suitable for bivouacking (see practical information) and join the lower ridge of the Fouda Blanc.
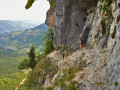
Take this path to the left (north-north-east) and follow it beneath the rocky overhangs. After a short stretch through the forest, you’ll reach the foot of a short climbing section marked with blue signs (see photo).
(2) Climb the short section using the excellent handholds (3c), then follow the winding path which generally ascends eastwards through the steep scree, interspersed with small rocky ledges. Ignore all the slings crossing the path horizontally.
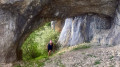
You’ll arrive beneath a larger ledge, into which the Trou de la Saignerie cave has been carved.
(3) Enter the cave and take the unsecured ladder (see photo) which allows you to cross the ledge, then continue climbing the winding path as you emerge from the cave.
You’ll cross the Fouda Blanc trail; a blue mark on the rock indicates where to continue, still heading east. You’ll reach a very short rocky chimney marked with a blue dot.
(4) Climb through the chimney. The passage is easy but narrow and cannot accommodate large rucksacks. Just above the chimney, the path runs horizontally northwards before turning south again after a steep drop-off, which can be crossed via a sturdy tree stump. The path emerges onto the Pinet plateau after a short rocky gorge (see location photo; the cairn is visible from inside the gorge), at the end of which you must climb a few steps.
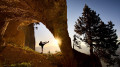
Head down to the east below the cairn to follow a cairn-marked path that heads south-east before making a wide circular loop to the east to go round a small rise. When the path turns south again, leave it in the opposite direction, off-trail to the north-east, heading towards Mont Blanc, which dominates the distant horizon. Continue on level ground along the hillside in this direction until you reach a large circular depression containing the massive arch of the Pinet sinkhole (see photo).
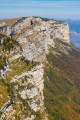
(5) After visiting the doline and the arch, set off again northwards, very slightly north-east, across vast areas of sharp limestone pavement. Stay on the level sections of these sharp limestone pavements (if the slope becomes steeper, head back up), heading towards the summit of Mont Granier (see this other reference photo).
At the western (upstream) edge of the sharp limestone pavement, a drinking trough marks the spot where you should turn north-east towards some pine trees and a limestone ledge surrounding a small cirque, at the centre of which stands a tiny shepherd’s hut.
(6) Descend to the hut and cross the cirque to the east to join the path leading down to the north-east. A hairpin bend takes the path westwards, allowing you to descend over slabs and rocks and reach green meadows.
Follow the valley floor down towards the north-east, keeping to the right-hand side of the depressions in the terrain. As soon as it is possible to turn right without having to climb back up a slope, head due east to reach the Trou de la Ragne, where theGR®®9passes through.
(7) Cross theGR®® trail, taking care of traffic (the ‘right of way’ rule does not apply), and head back up the opposite side to follow the edge of the basin north-eastwards, where theGR®® trail and the ruins of Les Haberts de Barraux are located. Head slightly uphill to the north-east to go round (to the east) a grassy ridge, then head due south along the bottom of the valley, bordered by conifers on the left (east).
As this valley narrows, a barely marked track (the grass is simply flattened) branches off to the left (east); go over a few sheep fence posts. Continue along this track, which often disappears, and when you reach the edge of denser vegetation, head due south to cross through a few trees and emerge into the meadows of the Croix de l’Alpe ridge (which is out of sight). Head eastwards up through the grass until you reach the north-south path leading to the Col de l’Alpe. Take the southern branch of this path, the one closest to the woodland on your left.
Keep the forest on your left as you turn eastwards and approach the edge of the ‘Labyrinthe de l’Alpe’. A gap in the rocks leading down there allows you to turn left (north) and reach its arch in about twenty metres after passing through a rocky gateway.
(8) This arch is usually blocked by snow until July. Continue eastwards for 50 metres and enter a wide, clearly visible gorge on the right (south). Follow this gorge westwards to reach the second arch, which is also covered in snowfields.
(9) It is only upon reaching it that you realise what appears to be a cave is actually an arch (see photo). Retrace your steps to exit the labyrinth to the east and take a few steps along the very busy Col de l’Alpe path. Pass a few trees and, on a flat area, take the first clearing on the left, heading due north. A very short, easy descent takes you down to a sheep fence, after which you follow the path—which is sometimes overgrown with stinging nettles (long trousers recommended!)—running northwards along the foot of the cliff. The path veers north-west to enter the small cirque below the Col de Belles Ombres.
(10) Once directly below the pass, turn east to descend along the thalweg path. This path enters a short section through the forest and is rather poorly marked (do not veer due south along what appears to be the path, but instead find your footing on a small sharp limestone pavement and rejoin the path on the other side). Leave the woodland via a narrow pass heading east, and at the first opportunity, take the path running level north-east across slopes that quickly become steep.
Continue along this path, which is the lower Belles Ombres trail. Vandals have recently marked it with fluorescent orange paint. After about a kilometre, a limestone rock shaped like a dromedary is visible below on the right (east), see this photo (see the caption for this photo for other, more recent photos).
(11) After visiting the camel-shaped rock, continue along the ridge path, which passes through several cirques before coming within sight of the limestone peak known as the Griffes de l’Ours (see this photo and this one). Ignore the orange markings and the rope, which appears to indicate a route upwards to the left. The rope is in poor condition and the route is, moreover, treacherous.
Carry on to the small pass on the ridge path, to the west of the Griffes. Behind this pass, a track to the right (south-east) leads to the comfortable summit of the Griffes.
(12) From the Griffes de l’Ours, return to the ridge and follow it northwards. As you cross a valley of deciduous trees, note a path rising to the left, but ignore it for now and continue to the next cirque. On the left, the hideous orange markings indicate the direction of the cave, which overlooks the path by two hairpin bends. This beautiful cave has two windows; see the photo.
Note: on the way down from the cave, it is possible to continue along the path to the next promontory, where there is a tiny arch, but it is impossible to go any further. The track leading up above the cave is a good spot for taking photos, but it too leads nowhere.
(13) Turn back from the cave to follow the ridge in the opposite direction (south) and return to the path through the deciduous woodland which you spotted on the way up.
(12) Take this path, which climbs steeply (use your ice axe if the ground is slippery), to quickly reach a large cirque of cliffs, beneath the upper Belles Ombres ridge path, near a cylindrical drinking trough. Head for the scree on the right and make your way onto the upper Belles Ombres ridge path.
Turn right (north) onto this ledge and follow it through magnificent cirques of cliffs (see this view or this one) to the usual exit point of the ledge, marked with yellow and blue dots.
(14) Rather than exiting and returning via the wooded ridge, a return via the path is more spectacular and allows you to see what you missed on the way up. So retrace your steps along the upper path and follow it south-west, passing above the Griffes de l’Ours (turn round). Red markings appear on the rocks, along with a huge fluorescent orange splotch left by the vandals mentioned earlier. Just past the shoulder where the two valleys meet, the red markings indicate that you should climb up to the right towards the cliffs. An orange arrow topped with an ‘A’ points in the same direction as a rope in poor condition, which is best ignored. Climb up the gully, which is half grassy and half rocky, and emerge 4 metres higher onto a path ascending south-west along a rocky outcrop (marked with a red line and arrow, then a double fluorescent orange arrow on this outcrop). Do not take this path straight away, but instead head up through scree to the north-west towards what quickly becomes apparent as the beautiful Belles Ombres arch.
(15) Pass underthe arch before retracing your steps and rejoining the path you left a few moments earlier. Follow this path (red dots and lines) up to the ridge and the summit of the Rochers de Belles Ombres.
Take the ridge path running along the cliff face to the south-south-west. As you emerge from a narrow passage flanked by small cliffs to the west (on your right), a clearing in the trees allows you to leave the ridge path and descend off-trail towards the west. At the foot of the clearing, you’ll need to cross the forest for about 200 m before reaching the valley you ascended on the way out. Cross this valley to climb up to the grassy shoulder to the west, then retrace your steps from the outward journey to reach the Trou de la Ragne.
(7) Cross theGR®® again, still following the route taken on the way there, and head up to the shepherd’s hut.
(6) Step onto the sharp limestone pavement forming the western edge of the valley and cross it heading due west. Once on the grass, head for a solitary tree where numerous cattle tracks converge.
(16) From this junction, take the path heading north-west (the one that veers furthest west amongst the alternative routes) to reach a tree line marking the end of a limestone valley. Climb up this limestone canyon heading due west, admiring the superb limestone ‘mushrooms’ and ‘tables’ lining it on both sides.
At the upper edge of the canyon, feel free to zigzag your way through to spend as long as possible amongst these beautiful formations, and finally emerge to the west onto the ridge path heading north towards the summit of Le Pinet.
Continue northwards in this way to the summit, marked by a cross. From the summit, the view of the Granier is truly spectacular.
(17) At the summit, opposite the Granier, look out for a yellow dot and a blue dot on the ground, right on the edge of the precipice: this is the start of the Fouda Blanc ridge walk. Head down towards these dots and follow the well-marked and signposted path which runs along the summit cliff, heading south-southeast. After a pine tree, a blue arrow on the cliff indicates that you must descend and head back in the opposite direction. The path heads north-north-west and passes beneath the summit of Le Pinet once more, climbing slightly, before turning onto the slope and descending to the track on the steep grassy slopes, which is the upper section of the Fouda Blanc route.
Follow this trail generally southwards, taking great care: whilst there are no technical difficulties, fatigue can make even a small mistake lead to a fatal fall.
The trail crosses the ascent route between points 3 and 4 (don’t forget to pick up your sleeping bag if you’ve camped at the Balme). It then becomes more comfortable and continues southwards through increasingly spectacular cliffs until it reaches the corner of the Roche de Fitta, where it turns east. It then heads east-north-east, passing beneath rocky ledges to join theGR®® 9 below the Pas de l’Échelle (it is possible to climb up onto the plateau a few metres further on).
(18) Head down to theGR®® towards the south-west, and after a wide circular loop to the left, join the Pratcel valley to reach the meadow of the same name, where there is a ‘tamed’ spring.
(19) Ignore theGR®® which branches off to the left (signpost) and continue along the valley floor to the south-west towards Saint-Même. The path zigzags over slippery rocks between metal cables installed to protect the cows from falling as they make their way up to the mountain pastures.
Ignore all the paths branching off to the left and head for the wide, vehicle-accessible track that winds endlessly north-westwards back to the starting point at Les Varvats (S/E).



 Visorando Member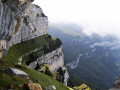

 Moderate
 Very difficult
 Difficult