


 Country:


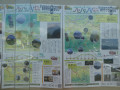
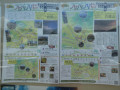
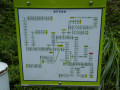
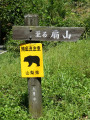
Note: Japanese characters are not available on Visorando. The names that walkers need to recognise on the spot are shown in an image (see photos). The relevant terms are indicated by
For this first section, the route is clearly signposted “Oogiyama”
(S) Follow the road heading north from the station. After about fifty metres, you reach a main road (the A20), which you cross to take the small road that climbs almost directly opposite (a slight zigzag). It passes under the motorway, then takes a wide left-hand bend to rejoin the motorway before turning right to continue climbing and reach a fork.
(1) Do not take the road on the left which leads down into the village, but the one on the right which climbs and quickly leaves the houses behind to enter the forest. At one point (with gardens on the left below), the tarmac gives way for a few hundred metres to a track suitable for vehicles, before becoming tarmac again. Follow the tarmac road as it climbs. You’ll come across a few junctions with roads joining from the left, which you should ignore. Shortly after the last junction, you’ll begin the first of a series of hairpin bends.
(2) As soon as you emerge from the first right-hand bend, leave the tarmac and turn left onto the signposted path which runs alongside the circular hairpin bends, rejoining the tarmac at the fourth bend. You then follow the tarmac, which is occasionally bordered by the golf course fence that you can just make out below.
(3) A few metres past the entrance to the golf course, you’ll find the “Nasinokidaïra Tozanguchi” bus stop – the ‘official’ starting point of the walk if you’ve taken a bus this far. Continue along the tarmac for a short while, then leave it behind for good to begin the climb up a wide, well-marked path that branches off to the left. All that’s left to do is climb… Any sections that might be tricky are clearly signposted. Except for one spot, where you pass close to an area of felled trees; there’s a lovely path there that veers sharply to the left, almost level with the ground, which you mustn’t take: carry on climbing along the main path. You’ll then quickly reach the water source.
(4) You then climb on, quite steeply in places, to the pass.
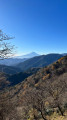
(5) The pass is clearly marked on the map and by a signpost indicating the three directions. Turn right towards the summit of Oogiyama (benches, views of the surrounding ridges and Mount Fuji, cloud permitting).
(6) Turn back and return to the pass.
For this section, follow the signs for “Momokurayama”
(5) You then follow the ridge line more or less along a clearly marked path, initially heading west. Occasionally, you bypass an intermediate peak by skirting it on the southern side, but there are a few more or less steep ascents and descents (see profile), as with any ridge path in this area.
(7) You’ll come to a single junction with a path leading down to the left (south side) into the valley; do not take this one. After a steep climb that levels off gently, you’ll reach another junction.
(8) Continue for about 200 metres westwards to the summit of Momokurayama: a lovely viewpoint with tables and benches for a picnic.
(9) Head back down to the previous junction.
Final section signposted “Saruhashi éki”
(8) Head down to the right (south side): take care, as the slope is very steep with difficult and slippery sections; the path is fitted with a rope for a good stretch near the start.
(10) You finally reach a tarmac road, which you take to the left, passing through the middle of a water collection and treatment plant. You go through a small tunnel and, at a left-hand bend opposite a lovely property, there are toilets.
(11) These might come in handy. There’s even a vending machine selling (cold) drinks, but there are others with a wider selection – including hot drinks – a few hundred metres further down. We continue downhill, still quite steeply, and reach the junction with the ascending route for ‘Mount Momokurasan from Saruhashi Station’.
(12) We carry on south-west, then south.
(13) A little further down, you can visit the Shinto shrine at the top of the steps leading up to the right. Whilst the front is rather unremarkable, the carvings on the rear pavilion are well worth the short detour and the few steps.
Follow the road as it descends.
(14) At the junction, do not take the first road that passes under the motorway and stays to the north of the valley: carry on straight ahead, heading downhill. At the next junction, turn left under the motorway. You’ll cross a bridge over a deeply cut river valley. When you reach the traffic lights, turn right, then after 100 metres on this busy road, turn left onto the road leading to Saruhashi station (E).


 Visorando Member
 Moderate
 Very difficult