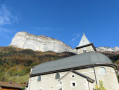
La Tête à Turpin and the Col du Pertuis as a circular route from Chessenay

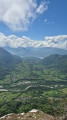
From Dingy-Saint-Clair, I suggest you head for the Tête à Turpin and then the Mont Téret plateau, whilst enjoying lovely scenery and numerous viewpoints. Please note that this is a challenging hike: there are difficulties on a few tricky sections requiring caution in exposed areas, and the route is not always easy to follow. Please read the description and practical information.

Details

n°67334996
Creation:
Last update:
Last review:
  • Walking
    Activity: Walking
  • ↔
    Distance: 9.18 mi
  • ◔
    Duration according to the author: 7 hrs 
  • ▲
    Difficulty: Very difficult

  • ⚐
    Back to start: Yes
  • ↗
    Ascent: + 4,406 ft
  • ↘
    Descent: - 4,386 ft

  • ▲
    Highest point: 5,902 ft
  • ▼
    Lowest point: 2,221 ft

Photos

Description of the walk

Update by the author on 10/05/2025:

  • minor adjustment to the route, mainly between points (17) and (19)
  • point (18) has been moved, as it was positioned on the wrong hairpin bend.
  • Changes made to the description in the paragraphs (18) and (19)
  • Correction to the description in paragraph (14)

Start the route from the hamlet of Chessenay at the end of the Route de Fraisy: you can park in the turning area without obstructing the road.

(S/E) Heading uphill, follow a path to the right of the Ruisseau de Tasset (towards Cornet), then a few metres further on, turn right onto a footpath.

(1) Further up, keep right at the junction and follow a path with no significant change in elevation.

(2) After a sharp bend in a small valley, turn left uphill onto a ridge overlooking the area.

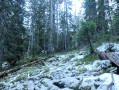
(3) Once you’ve passed three wooden mushroom sculptures, follow a path on the right uphill, still running above the valley: please note that on my last visit, the access to the start was only moderately visible due to fallen timber. About 150 m further on, ignore a forestry track on the right and carry on until you reach a Fork in the road.

(4) Carry on to the right, heading uphill. Continue along the path, which winds through a series of tight bends. Follow the path and, after about fifty metres, turn left onto a track leading to a forest track.

(5) Follow it to the left, heading uphill, until you reach its end.

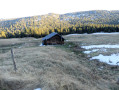
(6) Turn right, heading uphill, initially following a fairly faint track: see the ‘Practical Information’ section for further details. You will soon come to a well-defined path which you should follow to the left for a steady climb via a few hairpin bends leading to the Ravine private hut.

(7) Continue to the right, then, after a steep climb, you’ll reach the foot of a cliff. Caution: from this point onwards, you must remain vigilant as you’re on an exposed stretch of a fairly narrow path: see also the ‘Practical Information’ section. You’ll then reach a relatively gentle section known as the Tête de Turpin.

(8) Head right through woodland, then you’ll come to a chalet: feel free to have a look and leave a short message in the guest book. Carry on straight ahead to the far end of the small plateau to reach a lovely viewpoint with a bench.

(9) Retrace your steps, passing the chalet again on your way back.

(8) Carry on straight up the slope. Please note: this is a difficult section, mainly in terms of navigation, as it involves off-trail walking. Follow some faint tracks to a more open area, then head slightly to the right to reach the top of a ravine. Assessing the terrain as best you can where the cliff face is weaker, then head left, still climbing, before moving along a small ledge to the right. Be vigilant throughout this section: see § Practical Information.

(10) Further up, continue to the left, overlooking the cliffs, whilst remaining cautious: use the blue markers for guidance. A little further on, follow a path that becomes faint in places: if in doubt, follow the route that strays the least from the cliff edges. You will reach a path junction marked by a cairn visible on the right.

(11) From here, you must remain very vigilant all the way to the viewpoint much further on, particularly along the cliff edges: see § Practical Information. Continue straight ahead uphill, through a rather rocky landscape where you must remain alert. Keep an eye on the blue markings along a route that zigzags to the right and left until you reach a small, unnamed summit marked by a concrete slab.

(12) Caution: from this point onwards, the route presents additional difficulties. Continue slightly to the right to begin a difficult descent , including a short, tricky section where you will need to use your hands to descend. An ascent follows: right from the start, you’ll need to use your hands again; the route then becomes less difficult but requires you to pay close attention to the direction you’re taking. You’ll reach another small summit on the left marked by a cross: a lovely viewpoint.

(13) Continue straight ahead down a few steep slopes: the route is not straight and you’ll need to veer to the right or left whilst following the blue markings. Further down, you’ll reach a final viewpoint.

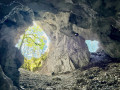
(14) Heading downhill, continue to the right through the woodland on a less rugged route: the path zigzags to the right and then to the right again over a few natural stony sections (notably sharp limestone pavements), following the blue markings as best you can. After the Grotte de la Savonnerie, there is a short climb before reaching a large meadow not far on: the path then disappears, so you should continue straight ahead, heading in a straight line towards the Chalet du Pertuis.

(15) Avoid this as far as possible (private property), then join a path on the left a short distance further on. Continue to the Col du Pertuis.

(16) Head straight on along the path downhill. After a well-maintained rocky section, the route continues along a forest track.

(17) At the second hairpin bend, carry on straight ahead along the path: a few metres further on, continue straight ahead at a junction. Follow the path for a good while down a fairly gentle slope.

(18) At a hairpin bend, ignore a path on the right leading to the forest track below and carry on for a short while.

(19) You’ll come out onto a forest track opposite a small building; follow it to the left, heading downhill. Join a forest track and follow it for about a hundred metres.

(20) Take a path on the left. Cross a track, then carry on straight ahead until you reach another track at a hairpin bend.

(21) Carry on almost straight ahead along the downhill path: follow the signposts. Along the way, ignore a junction to the left and continue to the right until you meet another path, leading to the first buildings in the hamlet of Cornet.

(22) Turn left towards Chessenay and follow the gently ascending path along the hillside for a good distance. Along the way, take a detour to the left to avoid a section of the path where the ground has collapsed, then begin a descent via a few hairpin bends.

(23) At the junction, keep to the right. Just past a picnic table, turn left onto the path and rejoin a junction you passed on the way out.

(1) Carry on to the right to quickly return to the starting point (S/E).

Waypoints

  1. S/E : mi 0 - alt. 2,221 ft - Chessenay – Route de Fraisy
  2. 1 : mi 0.09 - alt. 2,349 ft - Junction of the circular loop
  3. 2 : mi 0.33 - alt. 2,365 ft - Junction towards the ridge
  4. 3 : mi 0.44 - alt. 2,536 ft - Mushroom sculptures
  5. 4 : mi 0.61 - alt. 2,799 ft - Y-junction
  6. 5 : mi 1.02 - alt. 3,258 ft - Le Replan
  7. 6 : mi 1.29 - alt. 3,543 ft - End of forest track
  8. 7 : mi 1.81 - alt. 4,400 ft - Chalet de la Ravine
  9. 8 : mi 2.43 - alt. 4,895 ft - Colet
  10. 9 : mi 2.56 - alt. 5,062 ft - Tête à Turpin (1541 m)
  11. 10 : mi 2.84 - alt. 5,262 ft - Edge of the cliff
  12. 11 : mi 3.13 - alt. 5,673 ft - Path junction
  13. 12 : mi 3.38 - alt. 5,892 ft - Unnamed summit
  14. 13 : mi 3.73 - alt. 5,830 ft - Le Signal
  15. 14 : mi 3.87 - alt. 5,591 ft - Viewpoint
  16. 15 : mi 4.74 - alt. 5,213 ft - Chalet du Pertuis
  17. 16 : mi 5.01 - alt. 5,125 ft - Col du Pertuis (1566m)
  18. 17 : mi 5.2 - alt. 4,803 ft - Junction leading to the path
  19. 18 : mi 5.54 - alt. 4,537 ft - Hairpin bend
  20. 19 : mi 6.72 - alt. 3,747 ft - Le Cudry
  21. 20 : mi 7.42 - alt. 3,077 ft - Junction
  22. 21 : mi 7.66 - alt. 2,792 ft - Lacet Chemin
  23. 22 : mi 7.89 - alt. 2,464 ft - Cornet
  24. 23 : mi 8.92 - alt. 2,520 ft - Junction
  25. S/E : mi 9.18 - alt. 2,221 ft - Chessenay – Route de Fraisy

Notes

The starting point can be viewed on Google Maps: click here.

Good walking boots and walking poles are recommended.

Please take your rubbish away with you – nature will thank you for it.

This walk is not recommended for inexperienced walkers and presents difficulties mainly in three sections:
1/ Before reaching the Tête à Turpin: the narrow path running along the foot of the cliffs is exposed to rockfalls.
2/ Between Tête à Turpin and the Mont Téret plateau: the route follows an off-trail path through rocky terrain along a weak section of the cliff.
3/ Along the cliffs of the Mont Téret plateau: the route is rugged and winds to the right and left; it is recommended that you follow the blue markings closely, otherwise you risk entering sections that may be more difficult. A particularly challenging section is noted on a short downclimb.
If in doubt about the direction, please also refer to the route mapped on OSM.

Alternatively, you can follow a simpler route that avoids the cliff area: at point (11), continue to the right across the Grands Prés, then return via either the Col de Pertuis or the Col de la Bourse: see the ‘Mont Téret Plateau via the Col de la Bourse and the Col du Pertuis’ route.

In detail, below is a difficulty rating by section (a route is not uniform):
- Green: fairly straightforward terrain with no significant elevation changes or difficulty.
- Blue: slopes and/or elevation changes are more pronounced on a well-signposted route.
- Orange: routes presenting some technical difficulties and/or poor route conditions (markings or visibility of the path).
- Red: a difficult route due to significant elevation changes that may require some climbing, in an environment presenting certain hazards.
- Black: a route on a fairly difficult trail and/or involving imminent dangers.
- White: routes through very challenging technical terrain requiring specific equipment.

From (S/E) to (6): Blue difficulty
The route follows a path over a few steep slopes.
Yellow markings + signposts up to point (1), then no markings.

From (6) to (7): Blue difficulty
Thefirst challenge is spotting the path to take, which is only moderately visible for the first few metres: this is a new route not shown on maps (OSM and IGN), which then joins the route that is shown (note that it is, of course, possible to follow it, but the terrain may be somewhat difficult to navigate). From there on, the rest of the route is relatively straightforward.
No signposting.

From (7) to (8): Orange difficulty
The first section follows a path that is slightly less visible. Further up, the route then runs along the foot of cliffs on a narrow path exposed to steep slopes and the potential risk of falling rocks (take care).
No signposting.
From (8) to (9): Blue difficulty
A pleasant path winds through the woodland.
No signposting.

From (8) to (10): Red difficulty
From this point, the route follows off-trail terrain and the main difficulty encountered is navigation (route mapped by OSM):
-initially, continue straight ahead facing the slope through semi-wooded terrain,
- once you reach an open area, head right, crossing a short wooded section
- Overlooking a ravine, head left into a rocky area where you may need to use your hands slightly.
- From there onwards, you’ll need to read the terrain carefully, as there’s only one possible route. Not far on, follow a narrow ledge to the right, then head left.
No signposting.

From (10) to (11): Blue difficulty
Continue in the same direction, climbing upwards whilst staying close to the cliffs you are looking down upon:
-initially, this is done over somewhat uneven terrain, aided by a few slightly faded Blue markings.
- Afterwards, you’ll follow a path that occasionally disappears temporarily.
Blue markings
From (11) to (12): Orange difficulty
Follow the path uphill; you’ll then need to pay close attention to your direction in sections where the path temporarily disappears, mainly near karstic caves.
Blue Markings

From (12) to (13): Red difficulty
Initially, the route follows a downward path where you must be careful both with your direction and the rather steep slopes, particularly on one section involving descending rock faces.
Thesecond section involves ascending: this begins with a short section requiring the use of your hands, then continues on a less challenging route.
Blue markings

From (13) to (14): Orange difficulty
This section is walked downhill over a few steep slopes where you must be careful to keep your bearings.
Blue markings

From (14) to (15): Blue difficulty
The route runs through woodland on fairly gentle downhill slopes, winding left and right (follow the markings as closely as possible). Along the way, a few sections over sharp limestone pavement require a little care.
Blue signposting

From (15) to (16): Green difficulty
Follow a path that leads relatively easily to the Col du Pertuis.
No markings

From (16) to (17): Blue difficulty
After a short tricky section on a well-maintained path, the route continues along a forest track.
Marked with yellow arrows and signposts.

From (17) to (19): Blue difficulty
After the hairpin bend, you’ll tackle a steep downhill slope until you reach the junction. From there, the route continues for quite some time along a gently sloping path.
No signposting

From (19) to (20): Blue difficulty
You follow a forest track for a considerable distance without encountering any difficulties.
No signposting

From (20) to (21): Blue difficulty
You’ll come to a path with no steep inclines. After the hairpin bend, do not follow the signs for Chessenay at thefirst junction on the left.
Yellow arrow signposting

From (21) to (22): Blue difficulty
Follow a track, then a path, up a fairly gentle slope. Further on, the route descends via a few hairpin bends. Please note: the path has collapsed in one section, so take a detour to the left.
Yellow markings + old signposts towards the end of the section

From (22) to (S/E): Blue difficulty
Follow a path downhill, keeping to the signposts. Take care with the signpost visible shortly after the picnic table (point (1)), as it is quite damaged.
Yellow markings + old signposts

Worth a visit

Reviews and comments

5 / 5
Based on 3 reviews

Reliability of the description
5 / 5
Ease of following the route
5 / 5
Route interest
5 / 5
pierre-yves-73
pierre-yves-73

Overall rating : 5 / 5

Date of your route : Jun 28, 2025
Reliability of the description : ★★★★★ Very good
Ease of following the route : ★★★★★ Very good
Route interest : ★★★★★ Very good
Very busy route : No

Fantastic route but very challenging on the very narrow path that leads to the small plateau at the top of Turpin

Machine-translated

poustiquet
poustiquet

Overall rating : 5 / 5

Date of your route : Jul 07, 2025
Reliability of the description : ★★★★★ Very good
Ease of following the route : ★★★★★ Very good
Route interest : ★★★★★ Very good
Very busy route : No

Very beautiful route. Accurate and comprehensive guidebook. Thank you for the blue markers, which are good to follow meticulously.

Machine-translated

kaolak1
kaolak1

Overall rating : 5 / 5

Date of your route : May 10, 2025
Reliability of the description : ★★★★★ Very good
Ease of following the route : ★★★★★ Very good
Route interest : ★★★★★ Very good
Very busy route : No

I absolutely loved this hike, which took me along a very quiet path (I didn’t see a single soul on a sunny Saturday, which is rare), unlike the Parmelan right next door, even though the view is just as stunning.

However, I found it quite dangerous and I’d say that from point (7) to (15) you need to be very careful as you’re on the mountainside and then along the edge of a cliff, so the slightest mistake...

Fortunately, from point (10) to (15) there are plenty of blue markers, otherwise it’s too hard to find your way, especially on the sharp limestone pavement.

The only downside is that from point (21) onwards it’s a really long way, as you have to climb back up to get to Chessenay.

But overall, this hike really gets 10/10 – thank you very much.

Machine-translated

Other walks in the area

For more walks, use our search engine .

The GPS track and description are the property of this route's author. Please do not copy them without permission.